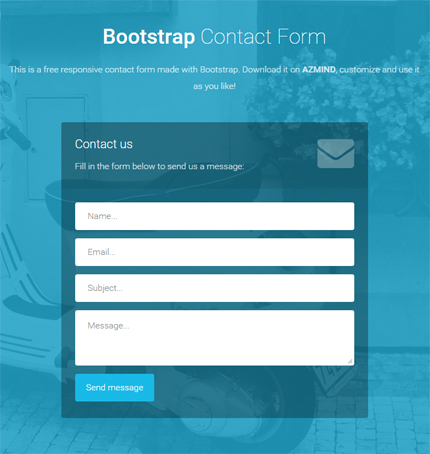
After one of Azmind readers asked a few days ago, today I’m writing this quick tutorial where I explain how to add a new field to these Bootstrap contact forms.
At the end you can take this tutorial and apply it to my other templates, free and premium, to add new fields to the contact forms. They’re (almost) the same.
So, let’s begin!
1. Introduction
For this tutorial I’ve used the “form-2” (which I like more than “form-1” because it’s transparent 😉 ) from the contact forms package here.
You can choose to download the original form template (from the link above) and make the modifications step by step. Or you can download the modified version at the end of this tutorial.
I’ve also updated Bootstrap and Font Awesome (in the modified version), but that’s not important.
2. The HTML
Open the “index.html” file and add the HTML code of the new field. In this case, I’ve added a “Name” field with this code:
<div class="form-group">
    <label class="sr-only" for="contact-name">Name</label>
    <input type="text" name="name" placeholder="Name..." class="contact-name form-control" id="contact-name">
</div>
Here is the resulting HTML code of the form:
<form role="form" action="assets/contact.php" method="post">
    <div class="form-group">
        <label class="sr-only" for="contact-name">Name</label>
        <input type="text" name="name" placeholder="Name..." class="contact-name form-control" id="contact-name">
    </div>
    <div class="form-group">
        <label class="sr-only" for="contact-email">Email</label>
        <input type="text" name="email" placeholder="Email..." class="contact-email form-control" id="contact-email">
    </div>
    <div class="form-group">
        <label class="sr-only" for="contact-subject">Subject</label>
        <input type="text" name="subject" placeholder="Subject..." class="contact-subject form-control" id="contact-subject">
    </div>
    <div class="form-group">
        <label class="sr-only" for="contact-message">Message</label>
        <textarea name="message" placeholder="Message..." class="contact-message form-control" id="contact-message"></textarea>
    </div>
    <button type="submit" class="btn">Send message</button>
</form>
3. The CSS
In this case there is no need to modify any CSS file, but if you want, you can style the new field(s) differently. Use the “style.css” and “form-elements.css” to add or modify the CSS code.
4. The PHP
We use some PHP code to validate the form’s fields from the server and send the email. The PHP code is in the “contact.php” file.
Here is the modified “contact.php” with the new field:
<?php

// Email address verification
function isEmail($email) {
    return filter_var($email, FILTER_VALIDATE_EMAIL);
}

if($_POST) {
    // Enter the email where you want to receive the message
    $emailTo = 'contact.azmind@gmail.com';

    $name = addslashes(trim($_POST['name']));
    $clientEmail = addslashes(trim($_POST['email']));
    $subject = addslashes(trim($_POST['subject']));
    $message = addslashes(trim($_POST['message']));

    $array = array('nameMessage' => '', 'emailMessage' => '', 'subjectMessage' => '', 'messageMessage' => '');

    if($name == '') {
    	$array['nameMessage'] = 'Empty name!';
    }
    if(!isEmail($clientEmail)) {
        $array['emailMessage'] = 'Invalid email!';
    }
    if($subject == '') {
        $array['subjectMessage'] = 'Empty subject!';
    }
    if($message == '') {
        $array['messageMessage'] = 'Empty message!';
    }
    if($name != '' && isEmail($clientEmail) && $subject != '' && $message != '') {
        // Send email
        $message = "Message from: " . $name . "\r\n" . $message;
        $headers = "From: " . $clientEmail . " <" . $clientEmail . ">" . "\r\n" . "Reply-To: " . $clientEmail;
        mail($emailTo, $subject . " (bootstrap contact form)", $message, $headers);
    }

    echo json_encode($array);

}

?>
If you compare the two versions of the “contact.php” file you’ll see that:
1) We’ve created a new variable to store the value of the new field:
$name = addslashes(trim($_POST['name']));
2) We’ve modified the response array and added “nameMessage” to store the result of the field validation:
$array = array('nameMessage' => '', 'emailMessage' => '', 'subjectMessage' => '', 'messageMessage' => '');
3) We’ve added the field validation code:
if($name == '') {
    $array['nameMessage'] = 'Empty name!';
}
4) We’ve added the new field’s value in the message (in the email’s text), if the validation is successful (the field is not empty):
if($name != '' && isEmail($clientEmail) && $subject != '' && $message != '') {
    // Send email
    $message = "Message from: " . $name . "\r\n" . $message;
    $headers = "From: " . $clientEmail . " <" . $clientEmail . ">" . "\r\n" . "Reply-To: " . $clientEmail;
    mail($emailTo, $subject . " (bootstrap contact form)", $message, $headers);
}
5. The Javascript (jQuery)
We use Javascript (jQuery) to make an AJAX call in the “scripts.js” file.
This means that when the user clicks the “Send message” button, we make a request to the “contact.php” file on the server passing all the fields’ values of the contact form (in the background, without reloading the page).
If the form validation is successful (see point 4 above), we hide the form and display a “thank you” message. If not, we display an error message (in this case we add the “input-error” class to the fields which makes their borders blue).
Here is the code in “scripts.js”:
/*
    Contact form
*/
$('.contact-form form input[type="text"], .contact-form form textarea').on('focus', function() {
    $('.contact-form form input[type="text"], .contact-form form textarea').removeClass('input-error');
});

$('.contact-form form').submit(function(e) {
    e.preventDefault();
    $('.contact-form form input[type="text"], .contact-form form textarea').removeClass('input-error');
    var postdata = $('.contact-form form').serialize();
    $.ajax({
        type: 'POST',
        url: 'assets/contact.php',
        data: postdata,
        dataType: 'json',
        success: function(json) {
            if(json.nameMessage != '') {
                $('.contact-form form .contact-name').addClass('input-error');
            }
            if(json.emailMessage != '') {
                $('.contact-form form .contact-email').addClass('input-error');
            }
            if(json.subjectMessage != '') {
                $('.contact-form form .contact-subject').addClass('input-error');
            }
            if(json.messageMessage != '') {
                $('.contact-form form textarea').addClass('input-error');
            }
            if(json.nameMessage == '' && json.emailMessage == '' && json.subjectMessage == '' && json.messageMessage == '') {
                $('.contact-form form').fadeOut('fast', function() {
                    $('.contact-form').append('

Thanks for contacting us! We will get back to you very soon.

');
                    // reload background
                    $.backstretch("resize");
                });
            }
        }
    });
});
As you can see, in this modified version we’ve just added the controls for the new “Name” field.
6. Conclusions
That’s it! We’ve just added a new field to our Bootstrap contact form. If you want, you can add other fields following the steps above.
If you have any question or suggestion for improving the code, let me know in the comments.
Below you’ll find the live preview and download links.
Demo and Download
DOWNLOAD: Bootstrap Contact Forms: How to Add a New Field (2918 downloads )
Want More?
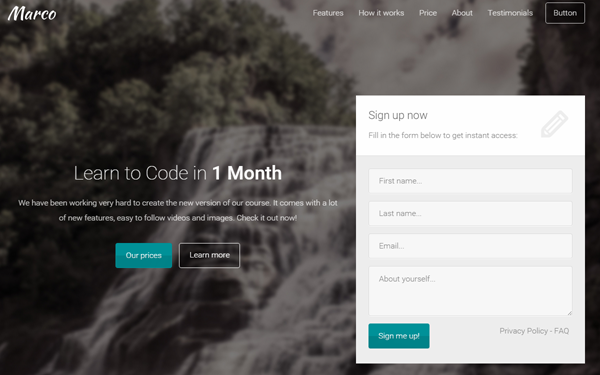
If you need a template with more layouts, color schemes and features, along with free support and free updates, you should take a look at the Marco template:
Stay Updated
Subscribe to the Azmind Newsletter and I’ll update you as soon as I release a new WordPress Theme, Bootstrap Template, Tutorial or other Freebie:
To learn how we use your data when you sign up to our newsletter, read our Privacy Policy here.




Here is a tutorial for a similar form:
https://azmind.com/2016/04/09/bootstrap-contact-form-dropdown-select/