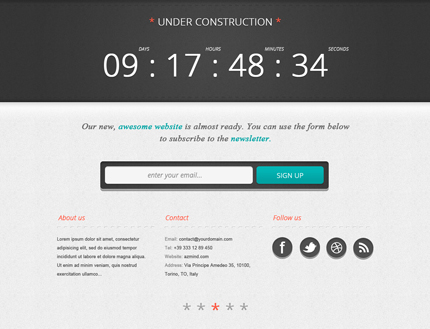
Creating an “under construction” page is very important when you’re launching a new website or product, or when you’re redesigning an established website. This way you can inform the users of the remaining time to the website’s launch and you can even start to collect their emails for notifying them when the site is ready. A well designed “under construction” page can catch the attention and can make your website or product look more professional in the users’ eyes.
So, today I’m going to show you step by step how to design an “under construction” (or coming soon) page in Photoshop. You can download the PSD file at the end of this tutorial. In the second part of the tutorial I’m also going to code this page in HTML/CSS/jQuery.
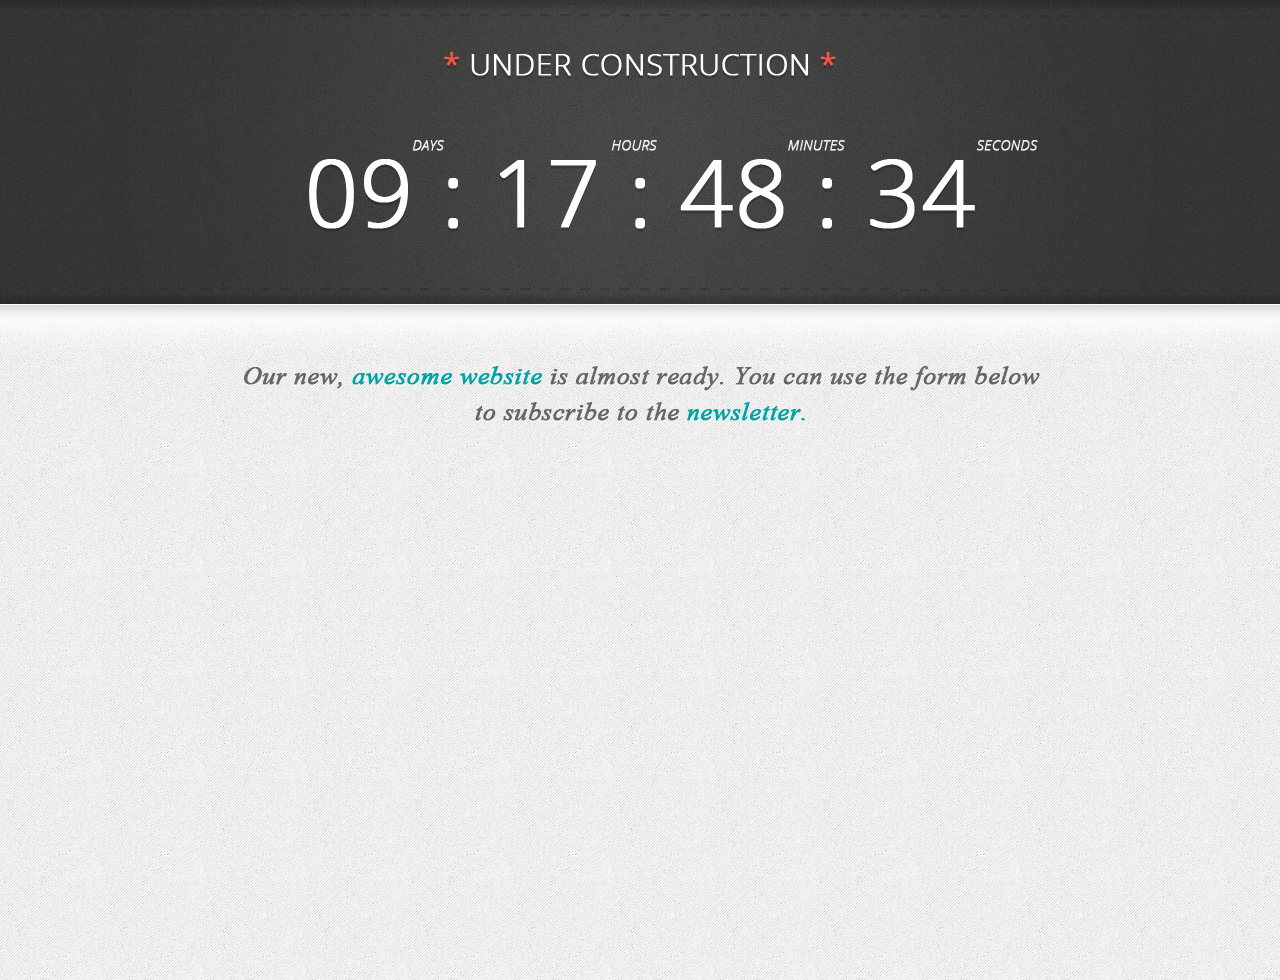
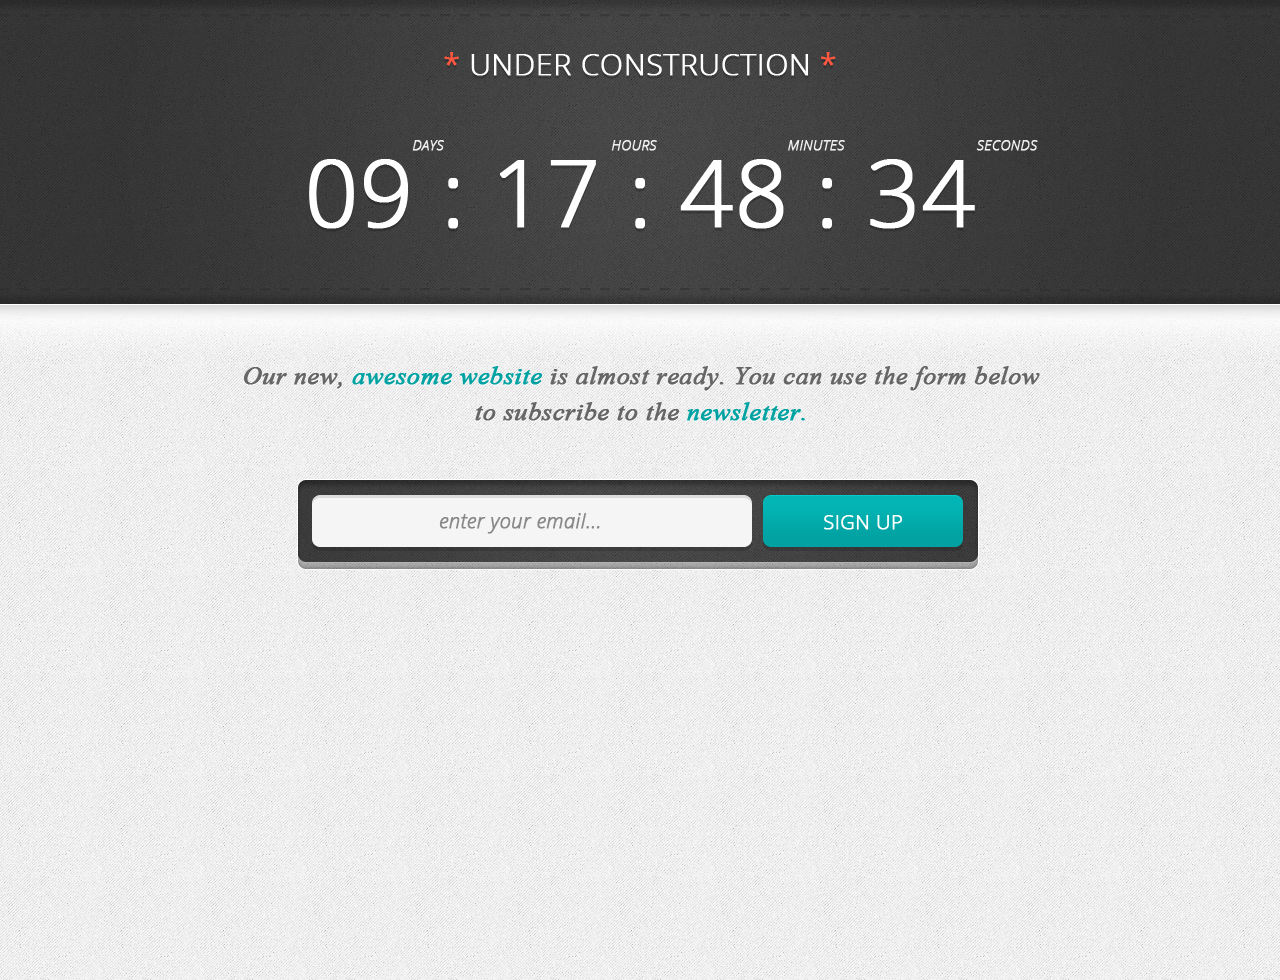
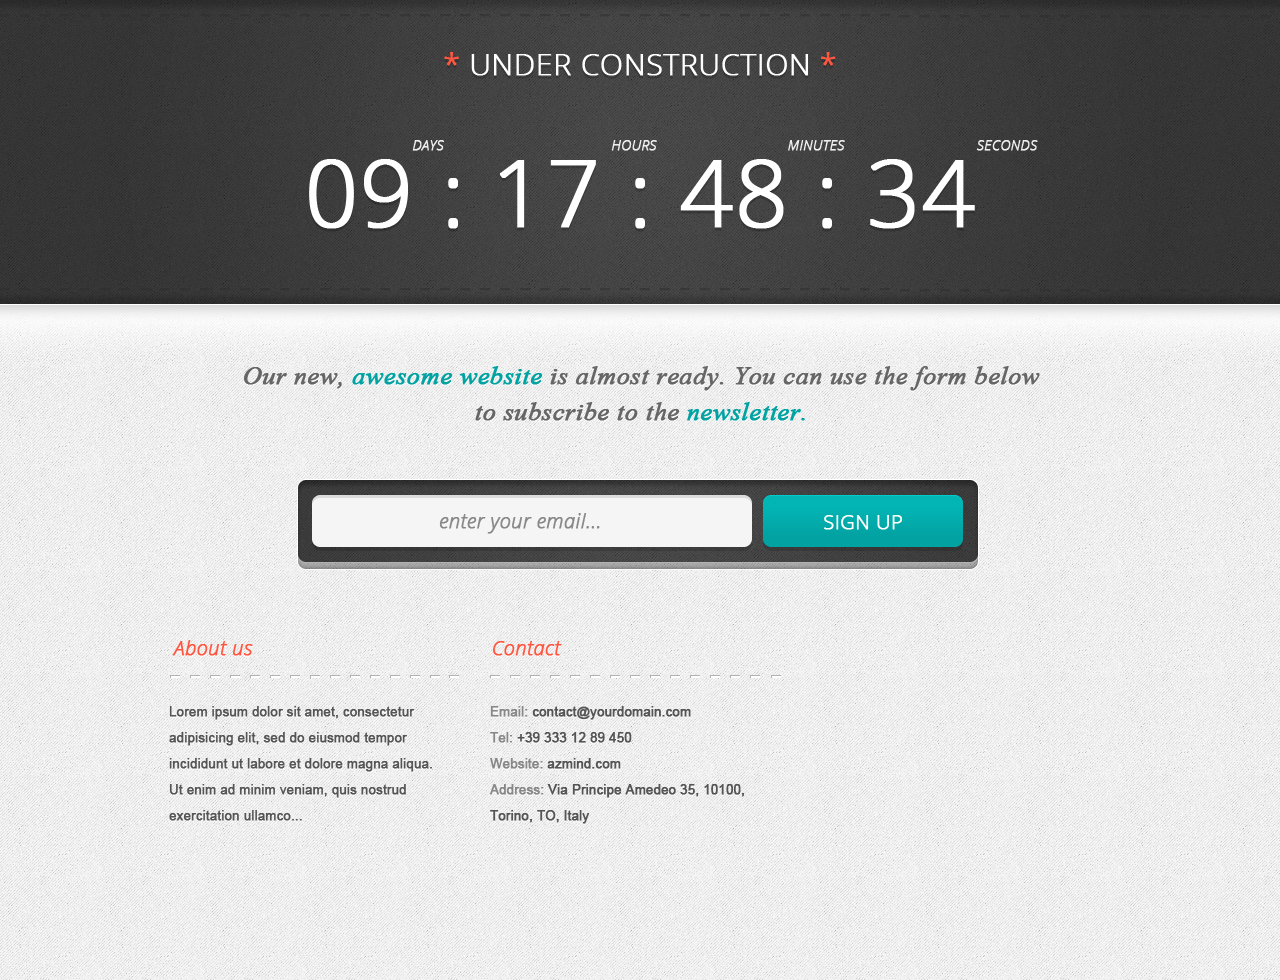
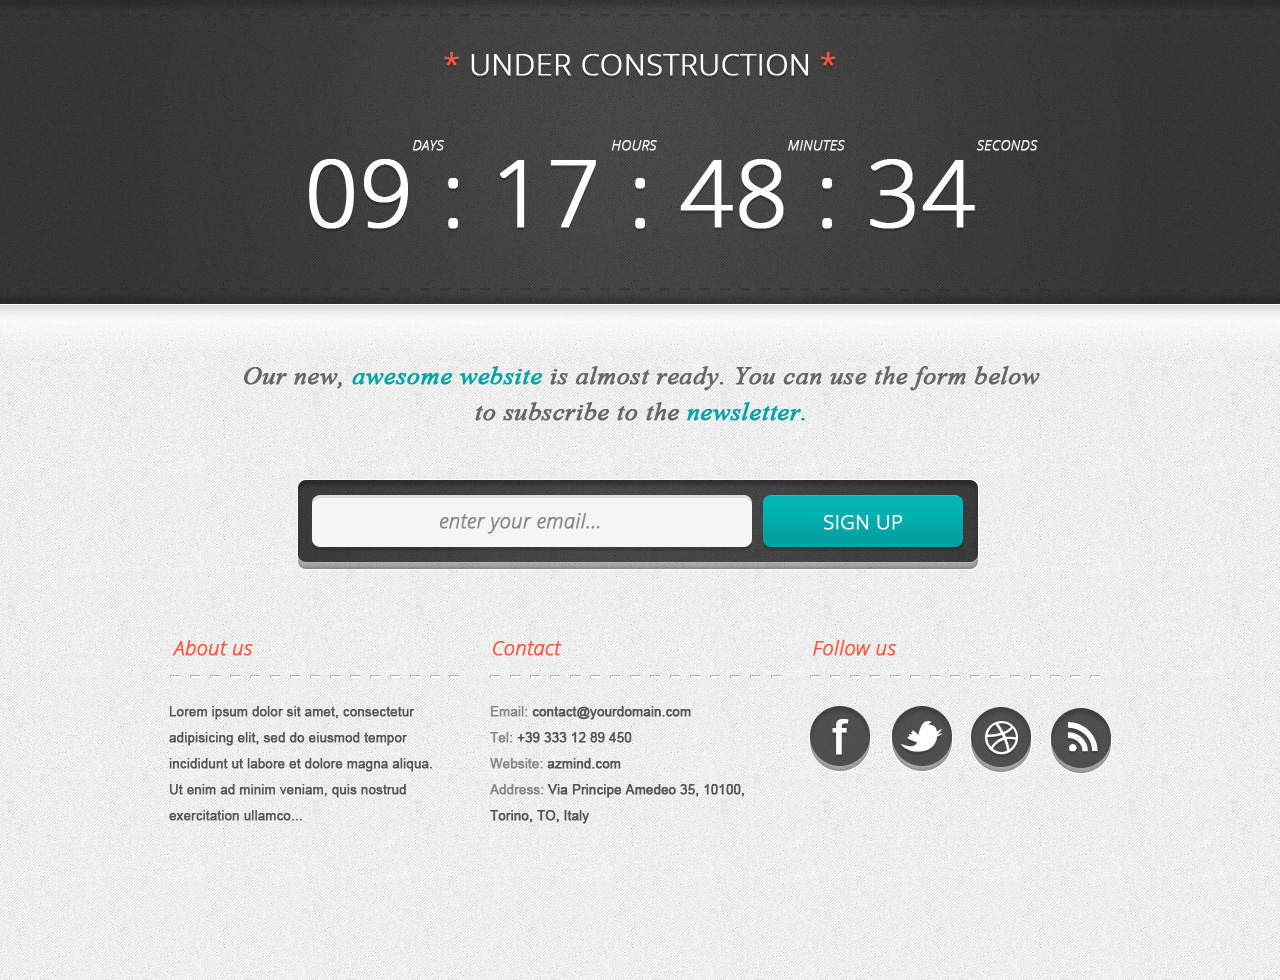
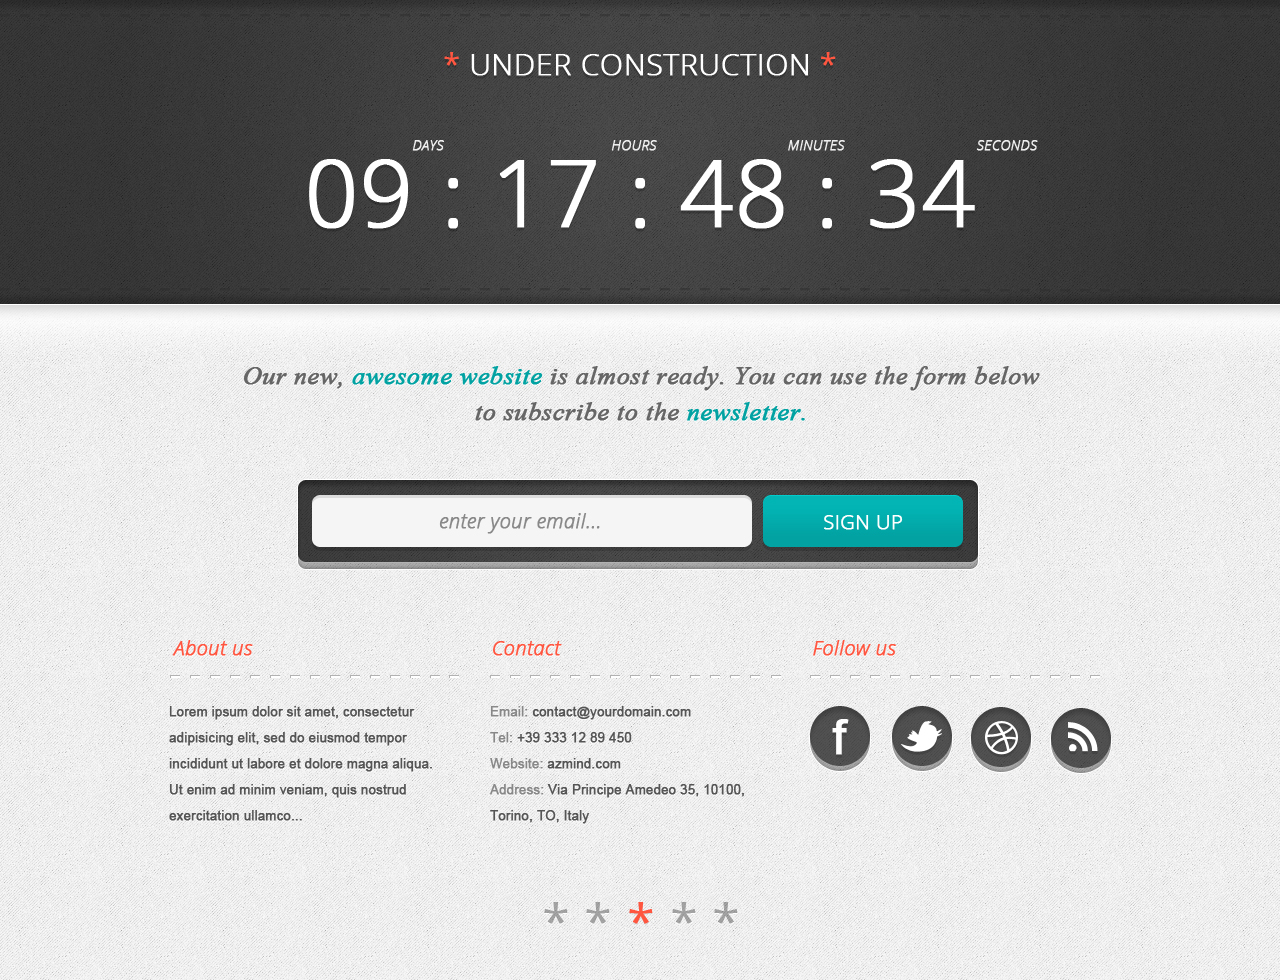
You can view the final result that we’re going to achieve in the image below. Let’s begin:
Final Result:
1. Setting up the Document and Background
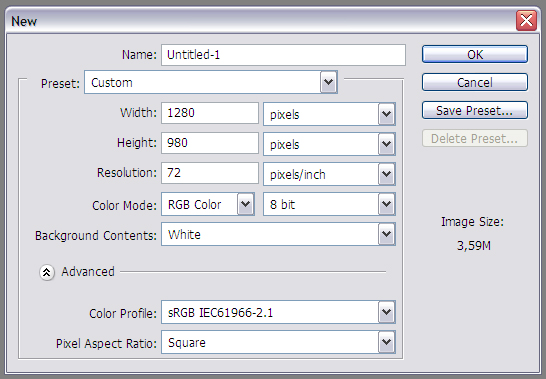
Create a new document (“File > New” or “CTRL+N”) and set the size to 1280 x 980 pixels:
Save the new project (“File > Save” or “CTRL+S”).
Create a new layer to use as a background for the page. Now we’re going to apply a pattern to this layer. Download the Orman Clark‘s subtle patterns from here (you have to enter your email). Once you download them, extract them and double click on the file “subtle-patterns.pat”.
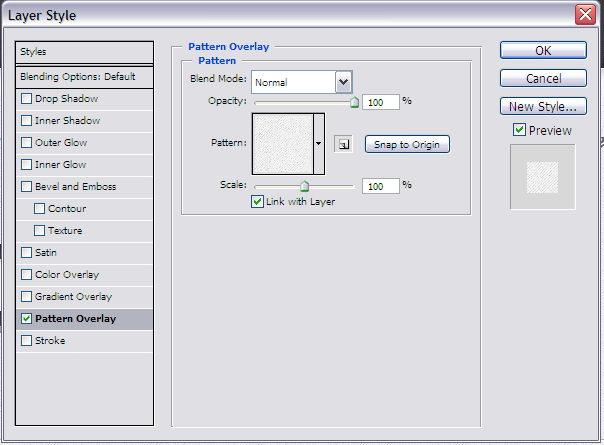
Right-click on the layer that we created above, select Blending Options and then Pattern Overlay. Select the pattern named “subtle-light-6” and apply these settings:
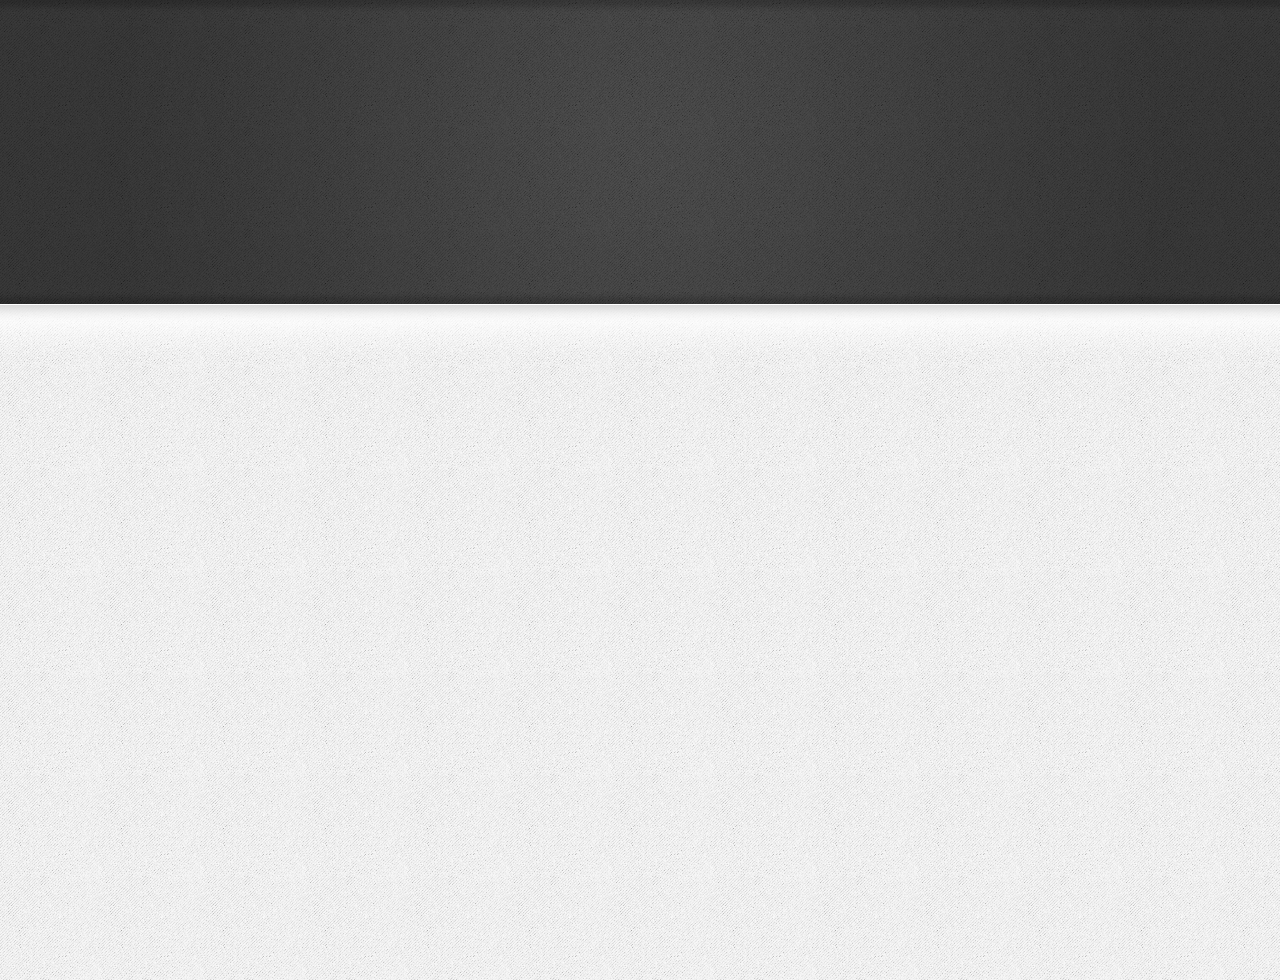
Now the background should look like this (click on the image to view it full size):
2. Creating the Header
2.a) Creating the header container
Select the Rectangle Tool and set its size to 1300 x 305 pixels:
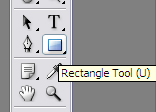
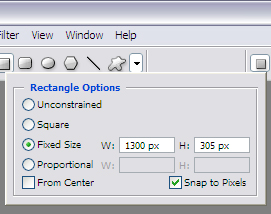
Click on the document to create the rectangle and move it on the top of the page (with the Move Tool). Double click on the layer thumbnail and set the color to #3d3d3d.
![]()
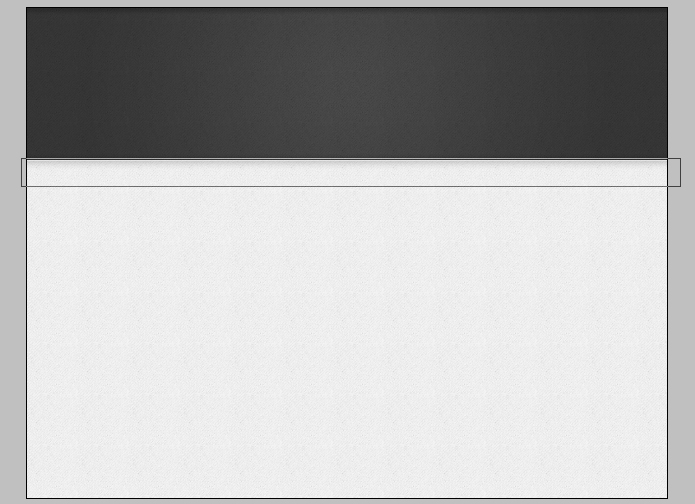
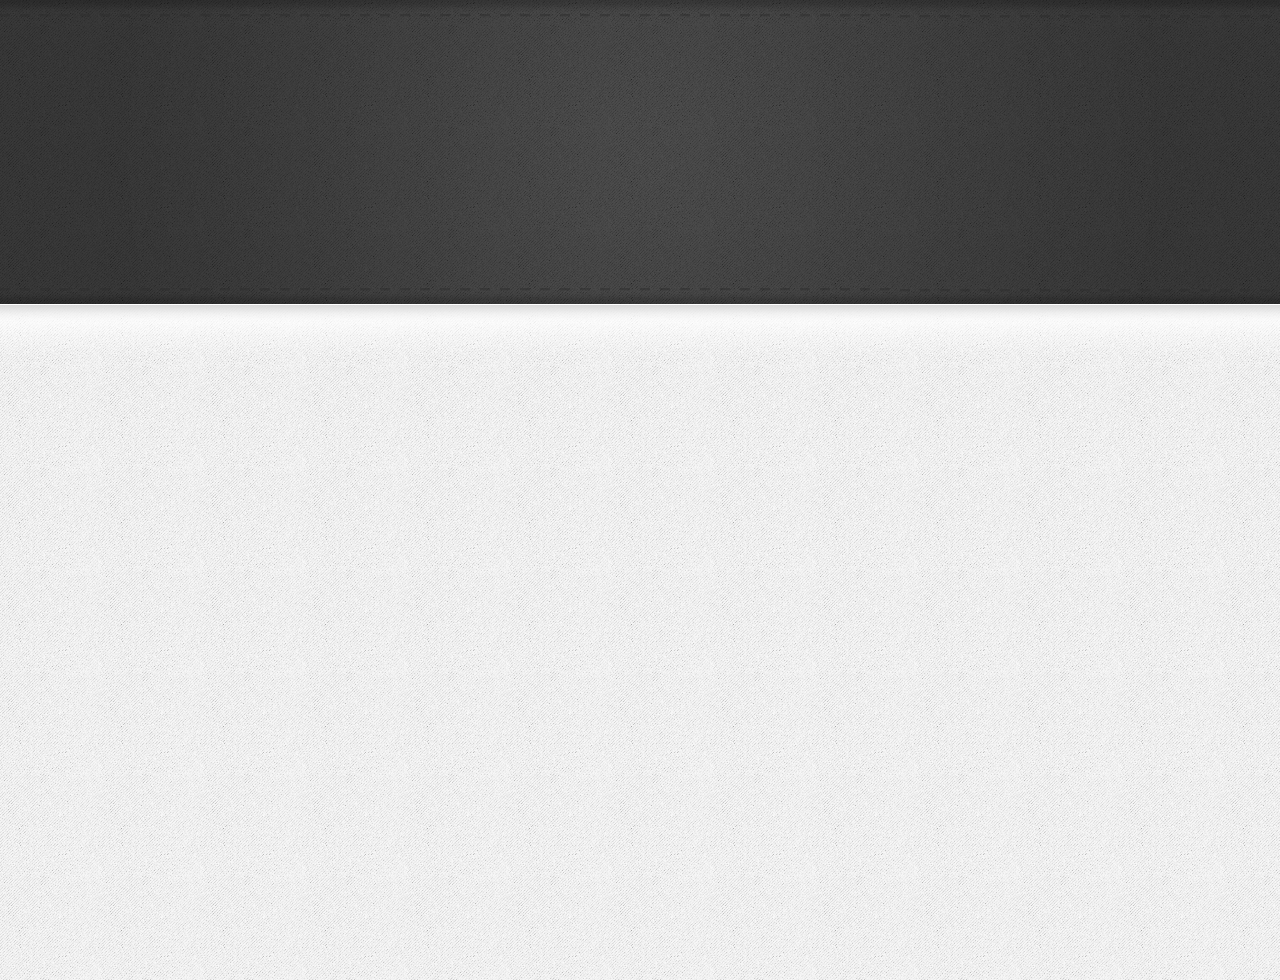
Now the page should look like this:
2.b) Styling the header
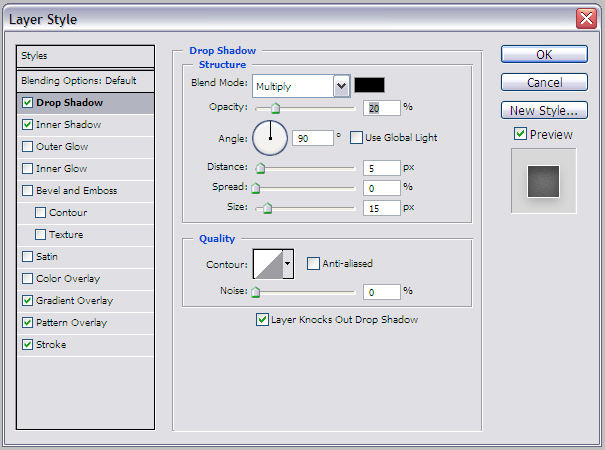
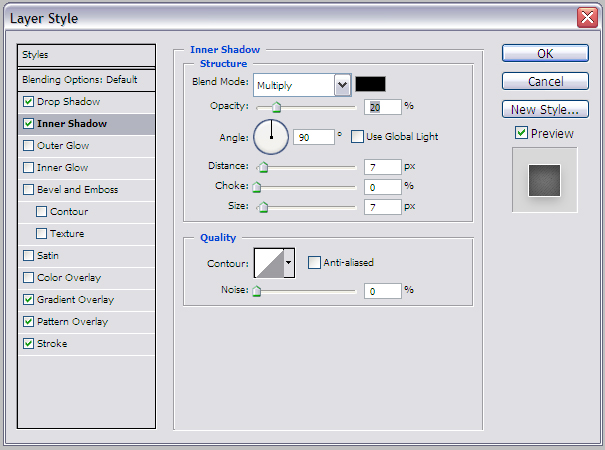
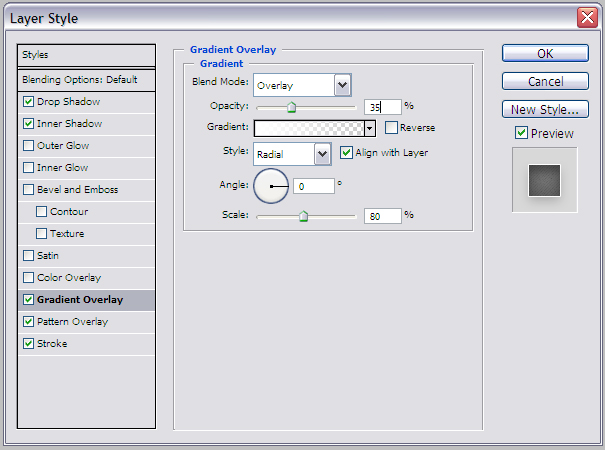
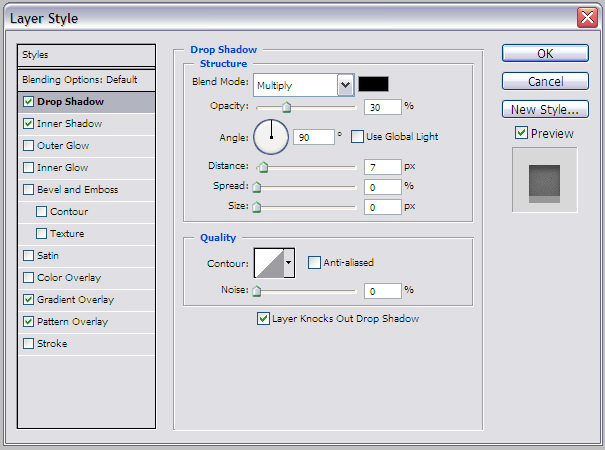
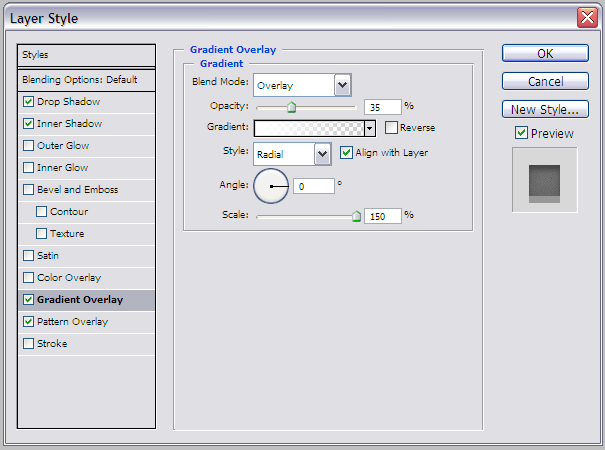
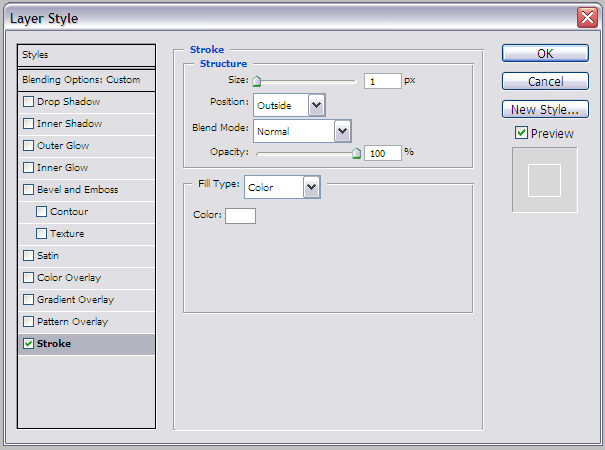
Right click on the header layer and select Blending Options. Add these styles to the layer:
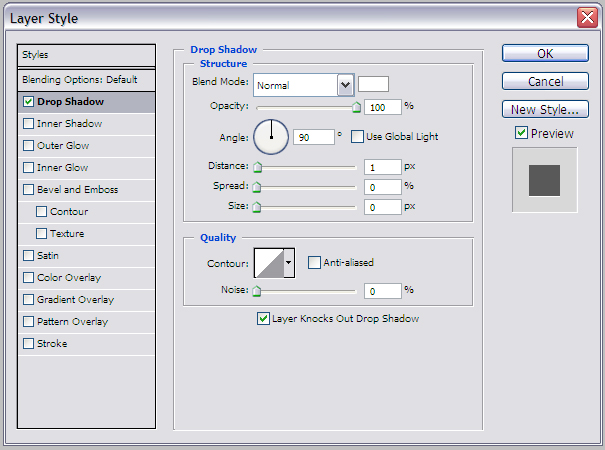
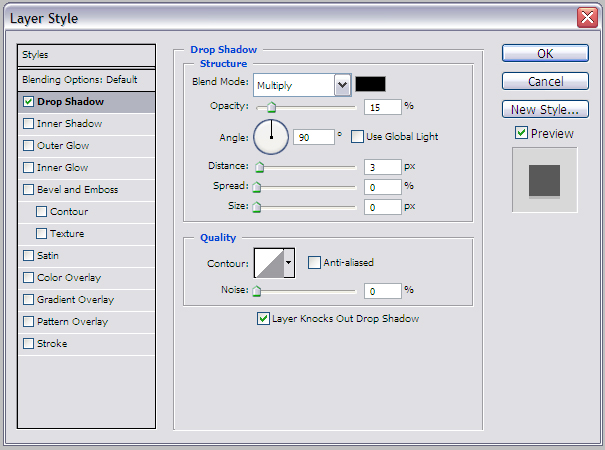
Drop Shadow (color #000000):
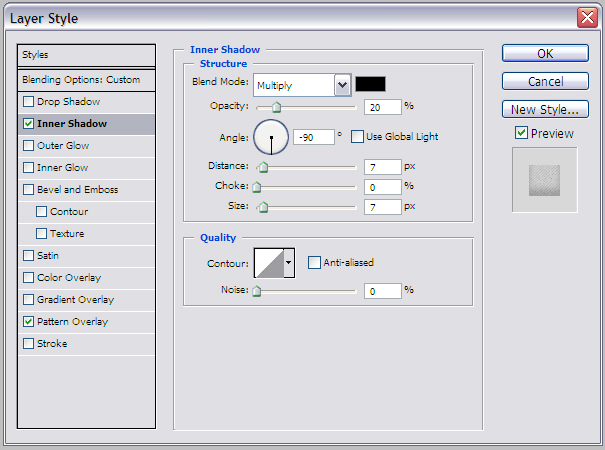
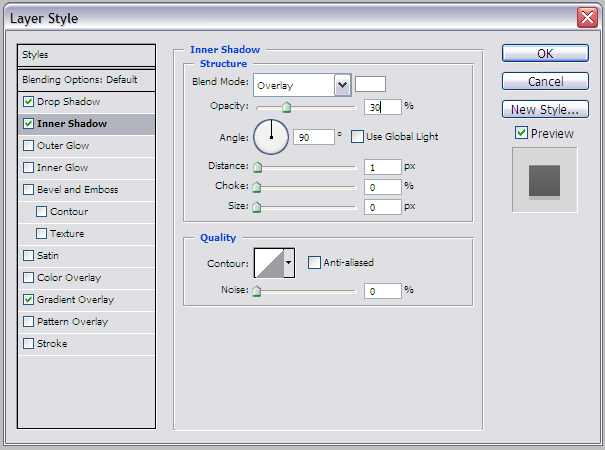
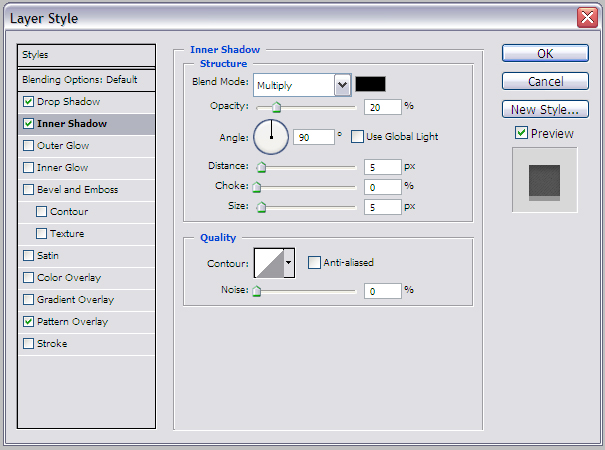
Inner Shadow (color #000000):
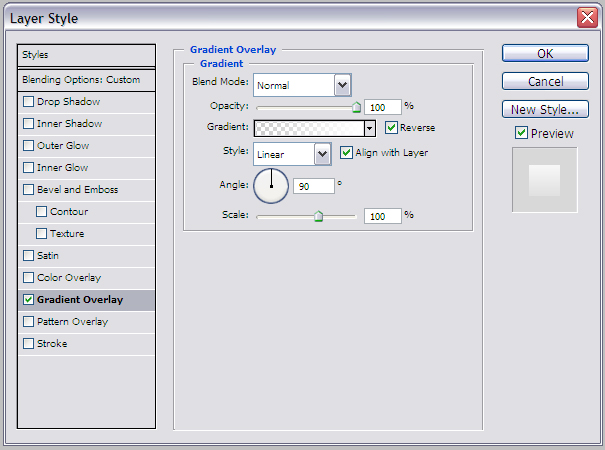
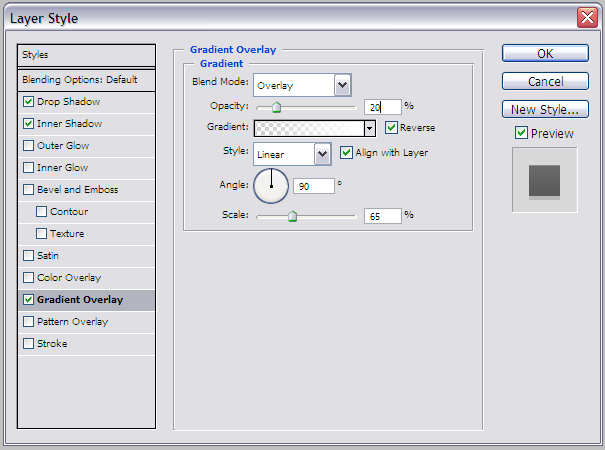
Gradient Overlay (from #ffffff to transparent):
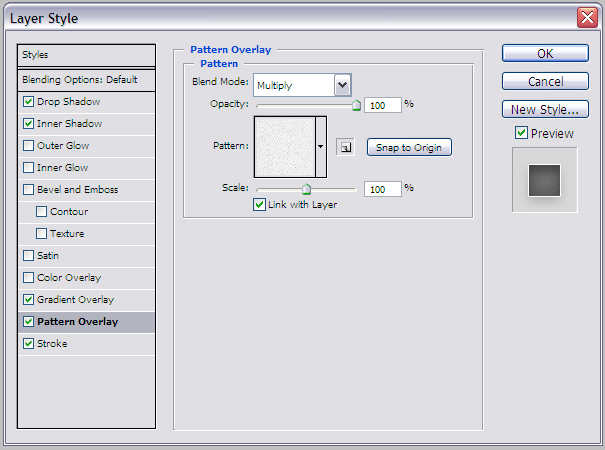
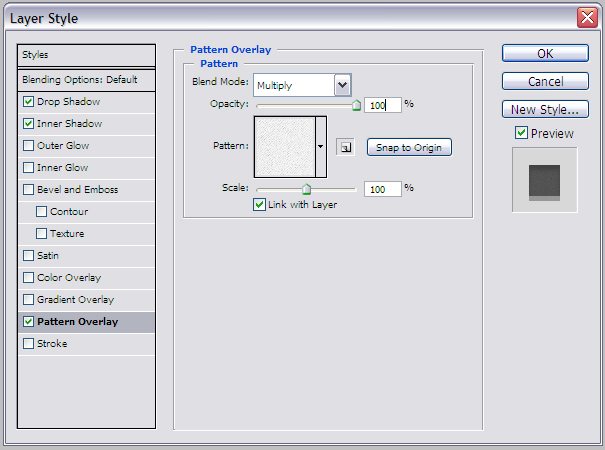
Pattern Overlay (use the “subtle-light-6” pattern that we used for the background):
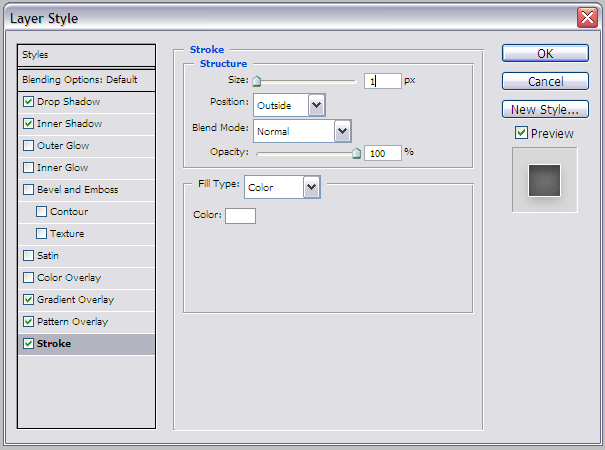
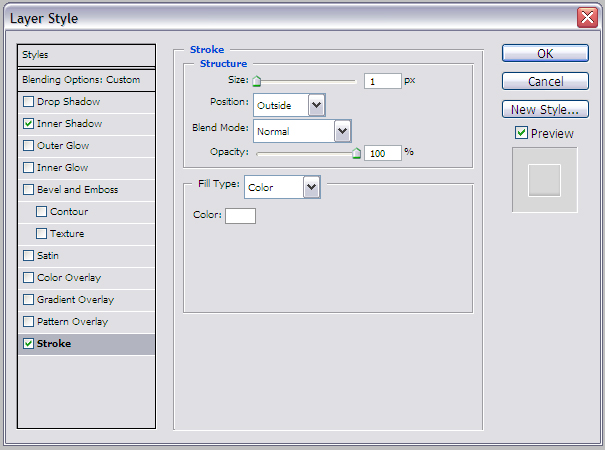
Stroke (color #ffffff):
Now duplicate the header layer (right click and select Duplicate Layer). Clear the style of the duplicated layer (right click and select Clear Layer Style). Set its fill to 0%:

Apply these layer styles:
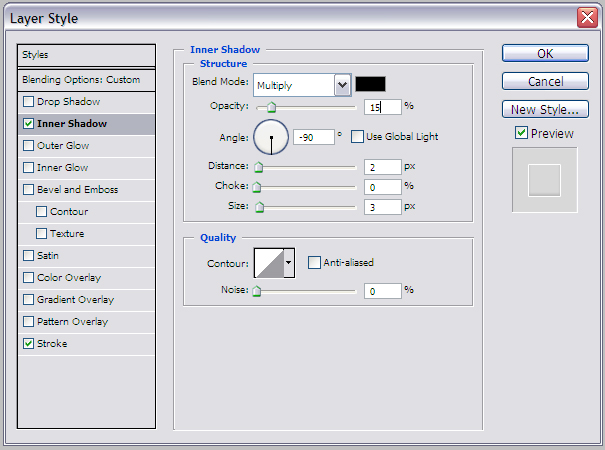
Inner Shadow (color #000000):
Pattern Overlay (use the “subtle-light-6” pattern that we used above):
Create a new rectangle on a new layer using the Rectangle Tool with a size of 1320 x 60 pixels. Put this layer under the header layer (the first layer that we created in the step 2.a.). Move the created rectangle below the header and set its fill to 0%:
Apply this layer style:
Gradient Overlay (from #ffffff to transparent):
After this step the page should look like this:
Now we’re going to add 2 dashed borders to the header. Create a new group (“Layer > New > Group”) above the header layers and name it “dashed border” or whatever you like. Select the Rectangle Tool, set the size to 10 x 2 pixels and create a new rectangle. The rectangle’s layer should be inside the group created above. Set the rectangle’s layer fill to 0% and apply these layer styles:
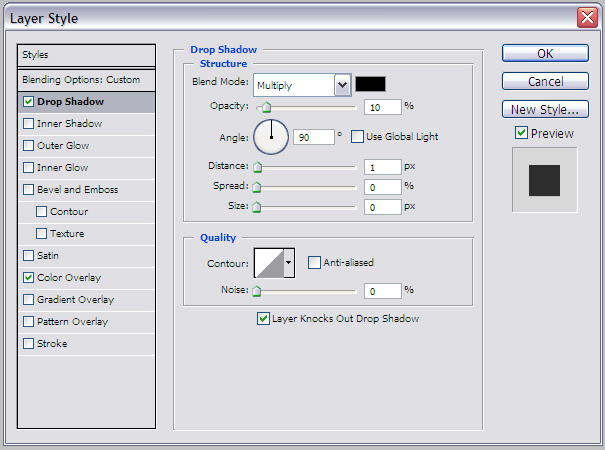
Drop Shadow (color #000000):
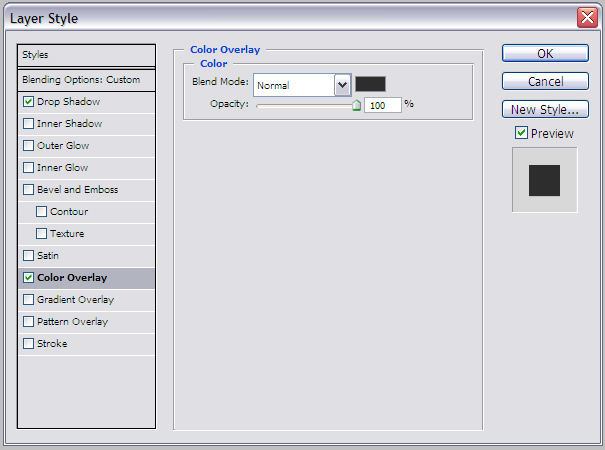
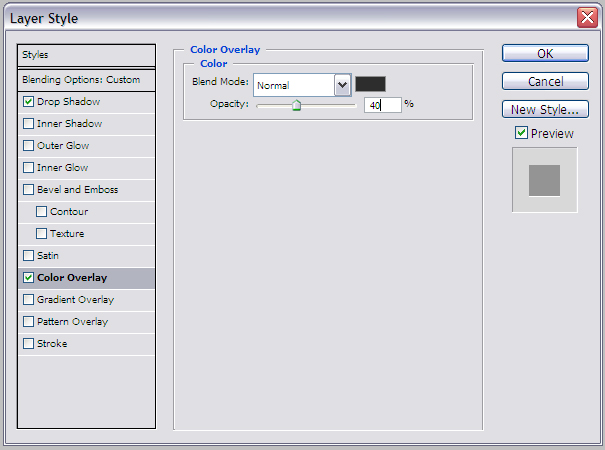
Color Overlay (color #2d2d2d):
Duplicate the rectangle’s layer and move it 10 pixels to the right. Use the Rulers (“View > Rulers”) and Guides (“View > Show > Guides”) to set the right position. Repeat this step until you create the entire dashed border. Click on the “dashed border” group created above, move the border and position it 15 pixels below the top edge of the header.
Duplicate the “dashed border” group and position the new border 15 pixels above the bottom edge of the header. The header container is now completed and the page should look like this:
2.c) Creating the countdown timer
From now on we’ll need the “Open Sans” font. So, download it from here in TTF format, install it on your computer and restart Photoshop if needed (make sure you save the project first).
Create a new layer and select the Horizontal Type Tool.

Apply these settings to the Type Tool and set the text color to #ffffff:

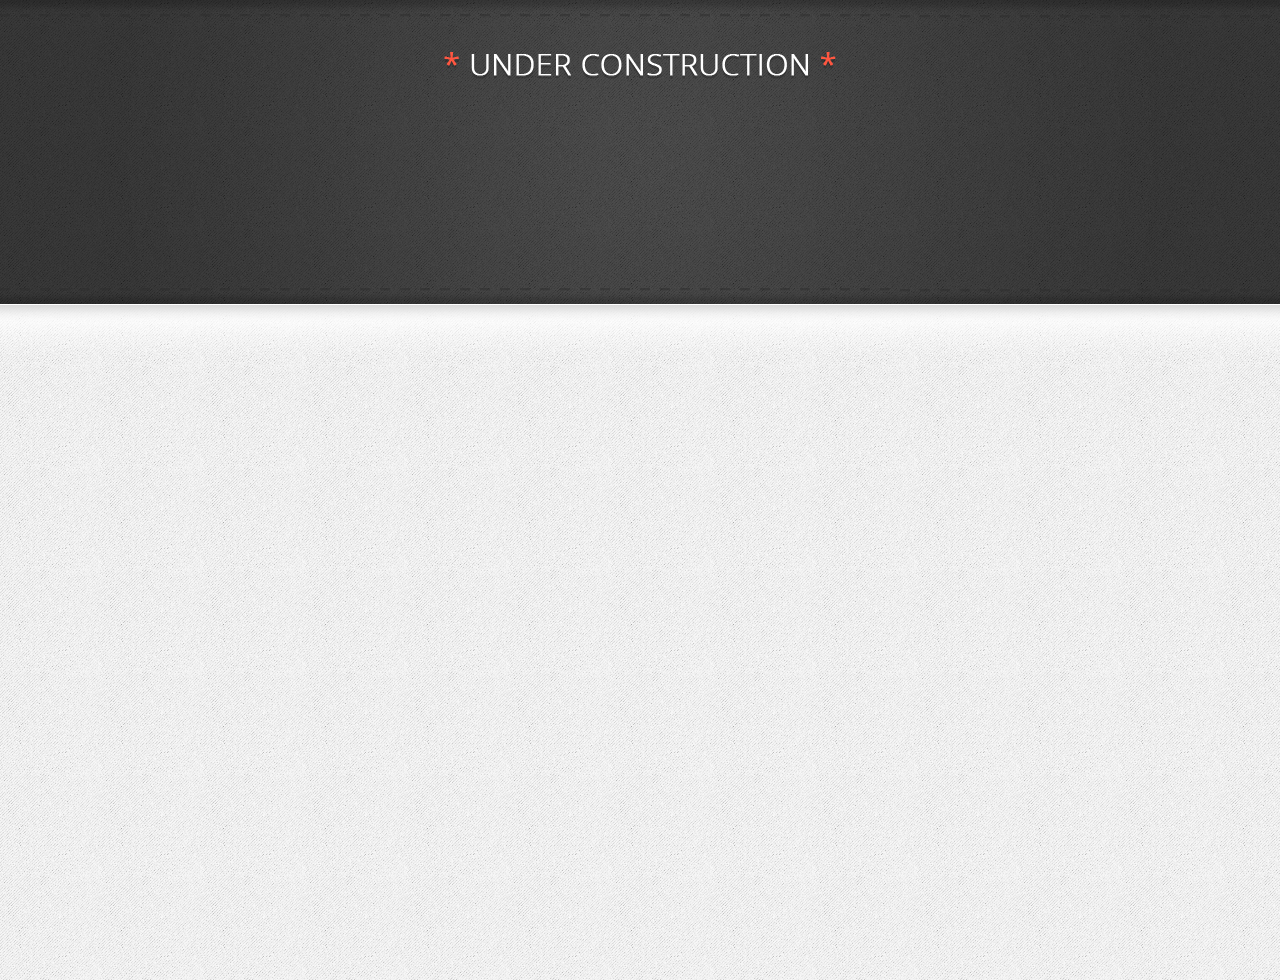
Type “* UNDER CONSTRUCTION *” using capital letters. Select the two stars (asterisks) with the Type Tool and change their color to #ff5640. Click on the “under construction” text’s layer, select Blending Options and apply this style:
Drop Shadow (color #000000):
Place the “under construction” text 50 pixels below the top edge of the header and also move it to the center of the page. Use the Guides and Rulers for setting the right position. After that, the page should look like this:
Now we’re going to create the countdown timer. Create a new group and name it “timer”. Create a new layer inside the group and select the Horizontal Type Tool. Apply these text settings and set the color to #ffffff:

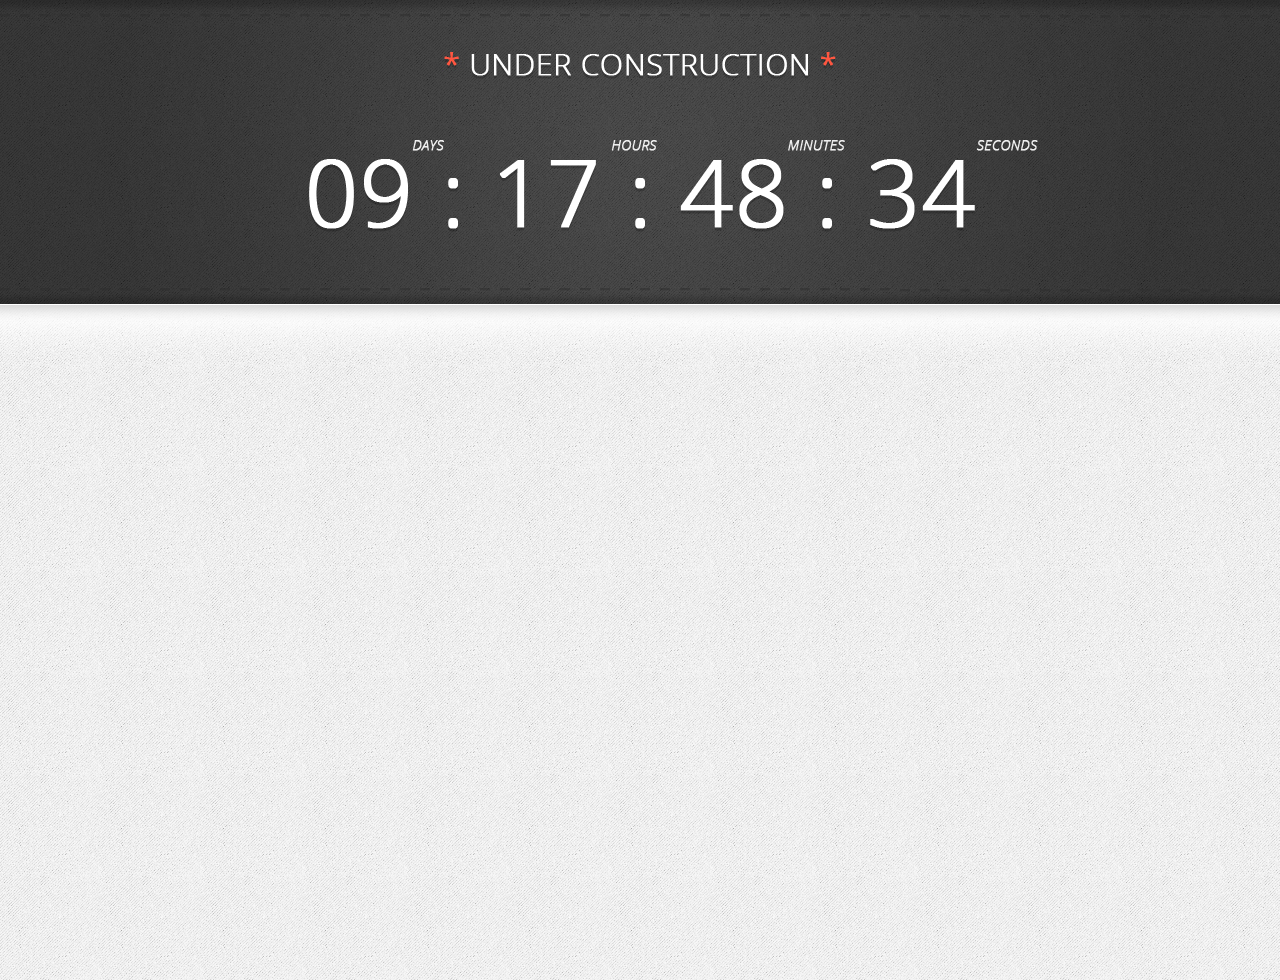
Type some sample numbers. In this example I have typed “09 : 17 : 48 : 34” but we’ll create a real counter in the second part of this tutorial. Apply this style to the counter’s layer:
Drop Shadow (color #000000):
Place the counter on the center of the page and 160 pixels below the top edge of the header.
For creating the “DAYS HOURS MINUTES SECONDS” text, select the Horizontal Type Tool again, apply the settings below and set the text color to #eeeeee:

Type the text. Note that the words in this text must be on different layers so you can move them independently. These layers should be inside the “timer” group so you can move them together if needed.
Move the “DAYS HOURS MINUTES SECONDS” text until you get this result:
3. Creating the Email Subscription Form
Create a new group and name it “newsletter subscription form”. Create a new layer inside the group. Select the Horizontal Type Tool, set the text color to #666666 and apply these settings:

As you can see, we’re using the “Times New Roman” font and a centered text for this section of the page. Now type:
“Our new, awesome website is almost ready. You can use the form below to subscribe to the newsletter.”
Select “awesome website” and “newsletter” from the text and set the color to #02a2a2. Select all the text and set the line height to 36 pixels from the Character palette (“Window > Character”). Place the created text 60 pixels below the bottom edge of the header section. The page should look like this:
Now we’re going to create the subscription form. Create a new layer inside the “newsletter subscription form” group. Select the Rounded Rectangle Tool and set the size to 680 x 82 pixels with a border radius of 8 pixels:
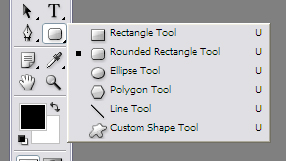
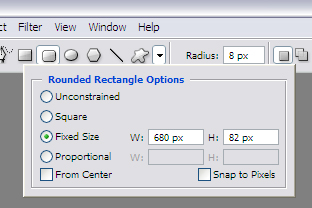
Click on the page to create the new rectangle. Double click on the rectangle’s layer thumbnail and set the color to #3d3d3d. Apply these layer styles:
Drop Shadow (color #000000):
Inner Shadow (color #000000):
Gradient Overlay (from #ffffff to transparent):
Pattern Overlay (use the “subtle-light-6” pattern that we used above):
The rectangle should look like this:
But we have not finished yet, we’re going to add more style to the rectangle. Duplicate the rectangle’s layer. Set the fill of the new layer to 0%, clear the layer style and apply this new style:
Pattern Overlay (use the “subtle-light-6” pattern that we used above):
Duplicate again the rectangle’s layer and move the new layer below the rectangle’s layer. Set the new layer’s fill to 0%, clear the layer style and add this new style:
Stroke (color #ffffff):
Duplicate the rectangle’s layer for the last time and move the new layer below the rectangle’s layer. Set its fill to 0% and clear the layer style. Now move down this new rectangle with the “Move Tool (V)” as in the image below:
Apply these layer styles:
Stroke (color #ffffff):
Inner Shadow (color #000000):
The form should look like this:
Now we’re going to create the input field.
Select the Rounded Rectangle Tool, set the size to 440 x 52 pixels and the border radius to 8 pixels. Click on the page to create the rectangle. Double click on the rectangle’s layer thumbnail and set the color to #f5f5f5. Apply these layer styles:
Drop Shadow (color #000000):
Inner Shadow (color #000000):
Move the input field until you get this result (you should place it 15 pixels below the top edge of the form):
Create a new layer, select the Horizontal Type Tool, apply the text settings below and set the text color to #888888.

Type the text “enter your email…” and place it on the center of the input field.
To complete the email subscription form, now we’re going to create the “Sign Up” button. Create a new layer, select the Rounded Rectangle Tool and set the size to 200 x 52 pixels with a border radius of 8 pixels. Click on the page to create the rectangle. Double click on the rectangle’s layer thumbnail and set the color to #02a2a2. Apply these layer styles:
Drop Shadow (color #000000):
Inner Shadow (color #ffffff):
Gradient Overlay (from #ffffff to transparent):
Move the rectangle (“Sign Up” button) until you get the result below. You should place it about 10 pixels on the right of the input field.
Create a new layer, select the Horizontal Type Tool, set the text color to #ffffff and apply these text settings:

Type the text “SIGN UP” and place it on the center of the “Sign Up” button. Move all the subscription form (if needed) until you get this result:
4. Creating the Info Section
4.a) Creating the “About us” section
Create a new group and name it “info”. Create a new group inside the “info” group and name it “about us”. Create a new layer inside the “about us” group, select the Horizontal Type Tool, set the text color to #ff5640 and apply these text settings:

Type the text “About us” and apply this layer style to the “about us” layer:
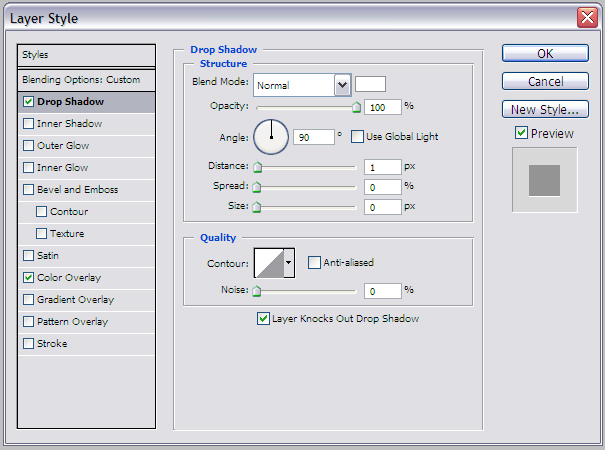
Drop Shadow (color #ffffff):
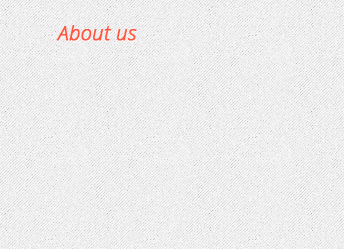
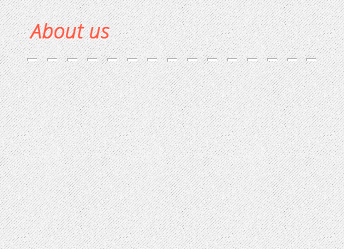
Now we’re going to create a dashed border as the one that we created for the header. Create a new group inside the “about us” group and name it “dashed border”. Create a new layer inside the “dashed border” group. Select the Rectangle Tool and set the size to 10 x 3 pixels. Click on the page to create the new rectangle. Double click on the rectangle’s layer thumbnail and set the color to #ffffff. Apply this layer style:
Inner Shadow (color #000000):
Duplicate the rectangle’s layer and place the new rectangle 10 pixels on the right of the first rectangle. Repeat this step until you create the entire border. The “about us” section must have a width of 300 pixels, so the border must have the same width. (This is because in the second part of the tutorial I will use the 960 grid system for coding the page in HTML/CSS, so the footer must have a width of 960 pixels. I will explain it better in the second part.)
Now select the Horizontal Type Tool, set the text color to #555555 and apply these text settings:

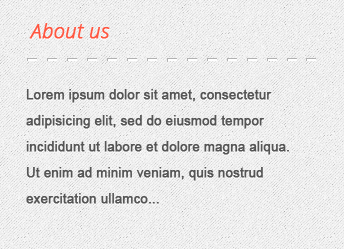
Type some sample text. Select all the text and set the line height to 26 pixels from the Character palette (“Window > Character”). You should get this result:
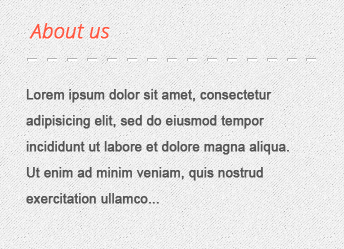
Apply this layer style to the sample text’s layer:
Drop Shadow (color #ffffff):
Now the “About us” section should look like this:
4.b) Creating the “Contact” section
Create a new group inside the “info” group and name it “contact”. Apply the same text settings and layer styles that we used in the step 4.a) for creating the “About us” section. (You can duplicate the “about us” group and edit it to create the “contact” section.) You should get this result:
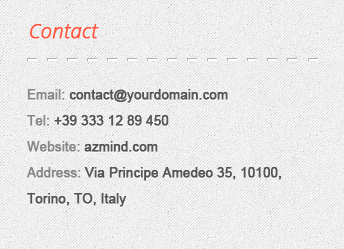
For the “Email”, “Tel”, “Website” and “Address” text set the text color to #888888. Place the “Contact” section 30 pixels on the right of the “About us” section. Align horizontally the two sections and place them 70 pixels below the email subscription form. The page should look like this:
4.c) Creating the “Follow us” section
The “Follow us” text and the dashed border are the same as above. So, in this step I’ll only explain how to create the four social buttons.
Create a new group inside the “info” group and name it “follow us”. Create a new group inside the “follow us” group and name it “facebook”. Create a new layer inside the “facebook” group. Select the Ellipse Tool and set the size to 60 x 60 pixels.
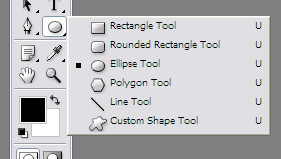
Click on the page to create the ellipse. Double click on the ellipse’s layer thumbnail and set the color to #555555.

Apply these layer styles:
Drop Shadow (color #000000):
Inner Shadow (color #000000):
Pattern Overlay (use the “subtle-light-6” pattern that we used above):
The button should look like this:

Duplicate the ellipse’s layer. Move the new layer below the first layer. Set the new layer’s fill to 0% and clear the layer’s style. Move down the new ellipse as in the image below:

Apply these layer styles to the new layer:
Inner Shadow (color #000000):
Stroke (color #ffffff):
The button should look like this:

Now we’re going to add the Facebook logo. Create a new layer and select the Horizontal Type Tool. Set the text color to #ffffff and apply these text settings:

Type “f” and apply this layer style:
Drop Shadow (color #000000):
Place the Facebook logo on the center of the button. The button should look like this:

For the other buttons repeat the steps above (or duplicate the layers). You’ll find the Twitter, Dribble and RSS logos in the PSD file that you can download at the end of this tutorial.
Place the social buttons 20 pixels away from each other until you get this result:

Now the “under construction” page should look like this:
5. Creating the Footer
The footer section is very simple. We’ll only have to create five stars. So, create a new group and name it “footer”. Create a new layer inside the group. Select the Horizontal Type Tool and apply these text settings:

Type “* *” (with a space in the middle) and set the layer fill to 0%. Apply these layer styles:
Drop Shadow (color #ffffff):
Color Overlay (color #2d2d2d):
Here is the result:

Create a new layer and select the Horizontal Type Tool. Apply the same text settings as above, set the text color to #ff5640 and type “*”. The layer fill must be set to 100%. Apply this layer style:
Drop Shadow (color #000000):
Now duplicate the first layer (the one with two stars). Align the stars horizontally and move them until you get this result:

Place the five stars 80 pixels below the “Info” section.
And that’s all!
Here is the final result:
Conclusion
I hope you liked the tutorial and I’d like to hear your thoughts. As I said in the beginning, in the second part I’m going to code this page in HTML/CSS and I’ll use some jQuery for the countdown timer.
So, stay tuned and don’t forget to follow me on Facebook and Twitter or subscribe to the newsletter (in the footer of this site) to be notified as soon as I publish the second part.
DOWNLOAD FILE: Under Construction Page PSD (3181 downloads )
LICENSE:
You can use this “under construction” page (or part of it) in personal and commercial projects, but you can’t sell or redistribute it directly. If you want to publish it somewhere, please refer to this page.
Stay Updated
Subscribe to the Azmind Newsletter and I’ll update you as soon as I release a new WordPress Theme, Bootstrap Template, Tutorial or other Freebie:
To learn how we use your data when you sign up to our newsletter, read our Privacy Policy here.

















Sorry, the comments are closed. If you have any question or suggestion, please use the Contact page.