Creating a cottagecore-style office is really about slowing down and adding gentle textures into your daily space.
In this article, I’ll give you some ideas to bring a bit of nature to the place where you work every day. These simple crafts are easy to make and won’t break the bank.
They give your space a warm, handmade vibe. You don’t need fancy tools or special skills. Just a bit of time, some basic supplies, and a willingness to enjoy making something with your hands…
Each project adds a soft, cozy touch. Your workspace starts to feel calmer and a whole lot more personal.
Decorating a home office or even just a small desk nook? These ideas let you shape a space that feels peaceful, creative, and, well, unmistakably yours.
Let’s get started!
Want to Save this Article?
Don’t miss: 12 Cottagecore Office Decor Ideas for a Dreamy, Slow‑Living Workspace that Brings Nature Indoors
To create most of these inspiring designs and make them as specific as possible, I use the latest AI design software. (along with my personal computer and my fingers, haha).
1. Pressed-Flower Clipboard or Frame
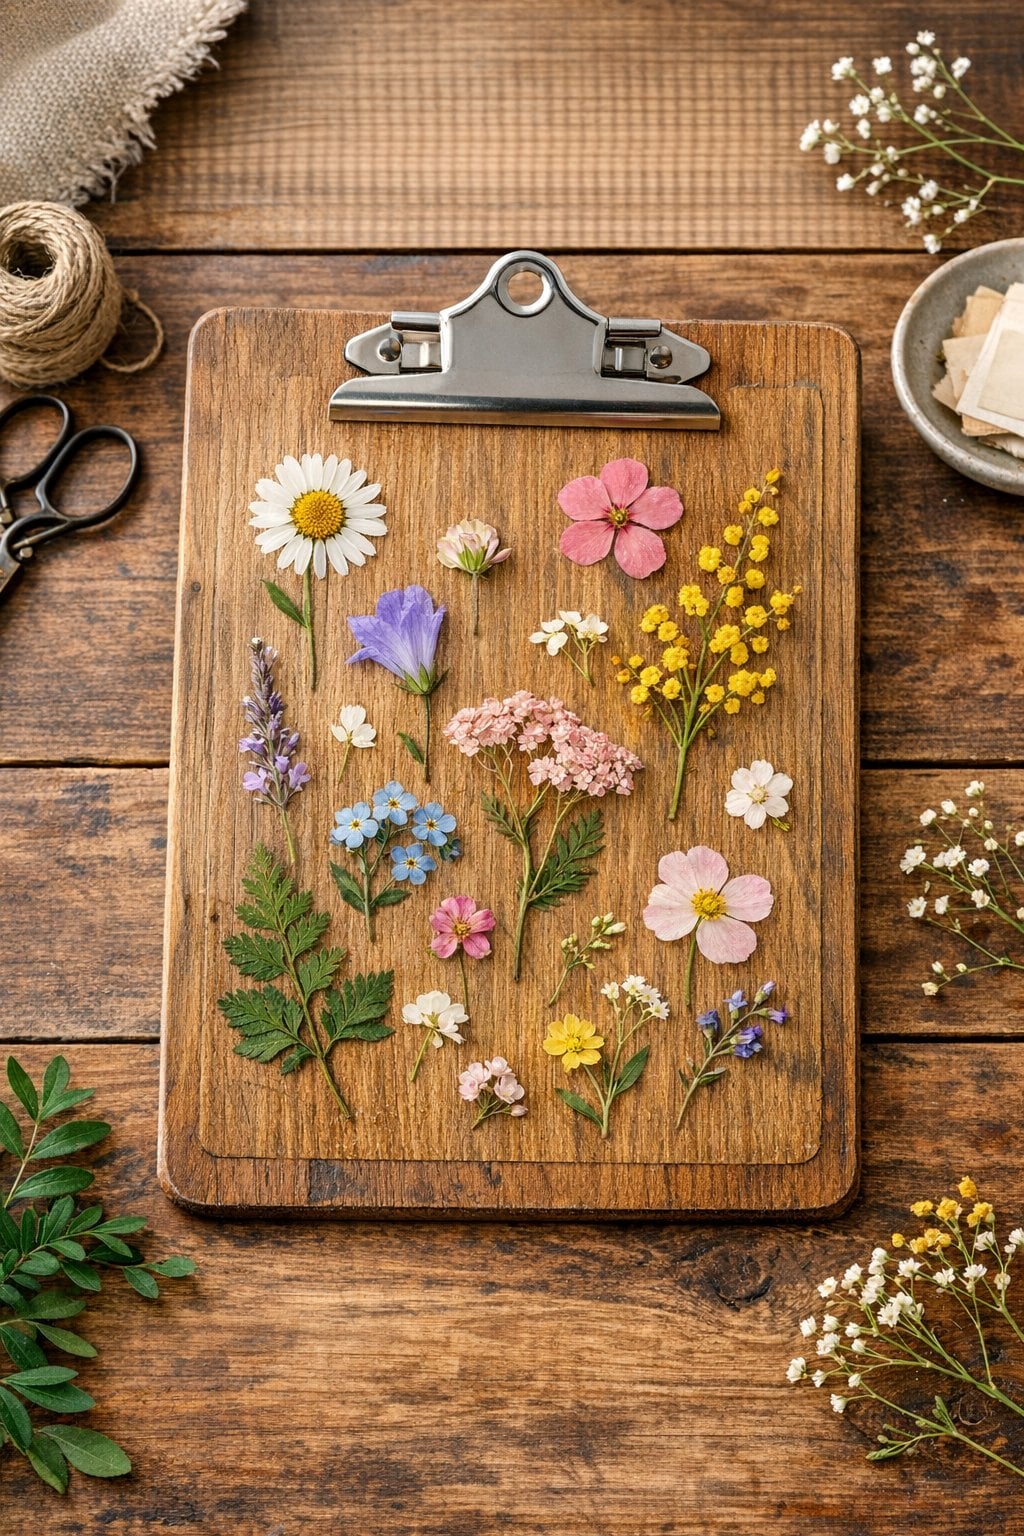
This craft adds a soft, nature-inspired touch to any cottagecore-style office. A pressed-flower clipboard or frame is a simple way to bring the outdoors inside while still keeping things practical.
You can use it to hold notes, photos, or to-do lists, and it looks nice on a desk or hanging on the wall. This project works well with flowers you’ve dried yourself or ones you’ve bought already pressed.
It’s a relaxing, creative activity that doesn’t require special skills, just a bit of patience and care.
Instructions:
- Step 1: Gather a plain wooden clipboard or frame, pressed flowers, Mod Podge, and a soft brush.
- Step 2: Arrange the pressed flowers on the surface until you like the layout.
- Step 3: Glue the flowers down with a thin layer of Mod Podge.
- Step 4: Let it dry, then brush another thin layer of Mod Podge over everything.
- Step 5: Allow it to dry fully before using or hanging it.
You’ll also love: Readers Are Loving these 12 Rustic Office Decor Ideas
2. Hand-Stitched Fabric Pen Cup

A hand-stitched fabric pen cup is a cozy way to organize pens, pencils, and markers on your desk. This craft uses a simple tin can and fabric scraps, so it’s a nice way to reuse materials you already have.
Adding a few easy stitches or a small embroidered detail gives it a handmade look that fits the cottagecore style. You don’t need to be great at sewing. Even simple lines or tiny flowers look charming.
The finished cup keeps your workspace tidy while adding a soft, homey touch.
Instructions:
- Step 1: Clean an empty tin can and remove any sharp edges.
- Step 2: Cut a piece of fabric to wrap around the can, leaving a small overlap.
- Step 3: Add simple stitches or embroidery to the fabric if you like.
- Step 4: Glue or sew the fabric into a tube and slide it over the can.
- Step 5: Smooth out any wrinkles and let the glue dry before filling with pens.
Read also: 10+ Desk Decor Ideas with Plants to Create a Fresh, Aesthetic Office (Even in Small Spaces)
✨ What's Your Office Decoration Personality?
Discover your ideal workspace vibe - take this quick quiz to reveal the office style that matches your personality.
-
1/3: When you walk into your office, how do you want it to feel?
-
2/3: Pick a must-have office item:
-
3/3: Your ideal office soundtrack:
Your Office Decoration Personality:
3. Lace-Trimmed Mason Jar Organizer
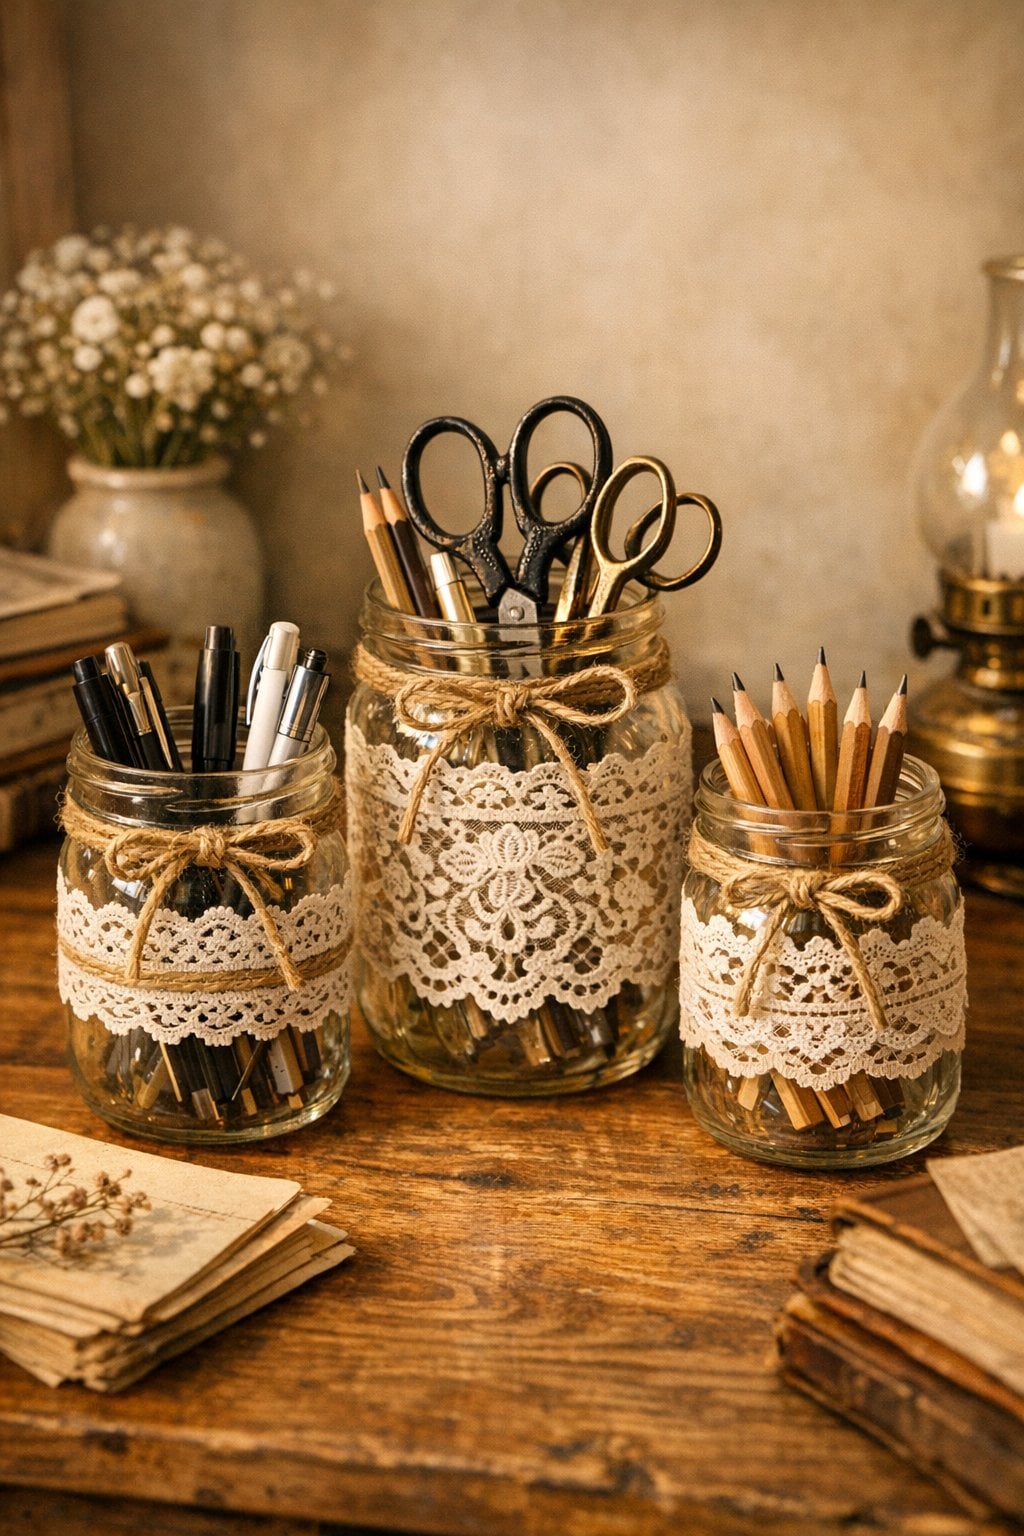
Lace-trimmed mason jars make sweet little organizers for pens, scissors, or paintbrushes. They bring a gentle, vintage feel to your office and are easy to customize with lace, twine, or ribbon.
This craft is simple and doesn’t take much time, so it’s a nice project for a quiet afternoon. You can make just one jar or a whole set in different sizes.
Grouped together on your desk or a shelf, they help keep things in place while adding a soft cottagecore look to your workspace.
Instructions:
- Step 1: Wash and dry your mason jars, so they’re clean and clear.
- Step 2: Wrap lace around the jar to measure how much you need, then cut it.
- Step 3: Use hot glue or craft glue to attach the lace around the jar.
- Step 4: Tie twine or ribbon around the top for extra detail if you like.
- Step 5: Let everything dry, then fill the jars with your office supplies.
Read next: 10 Cactus Desk Decor Ideas & Inspiration for a Fresh, Green Workspace
4. Mini Fabric-Covered Corkboard

A mini fabric-covered corkboard is a handy way to pin notes, reminders, and small photos while keeping your office cute and organized. By covering a cork tile with floral or neutral fabric, you turn a plain board into a soft, cottagecore-style accent.
It works well above a desk, on a wall, or even leaning on a shelf. This project is simple and flexible, so you can choose colors and patterns that match your space. It’s a nice mix of practical and decorative, and it’s easy to change what you pin on it.
Instructions:
- Step 1: Cut a piece of fabric slightly larger than your cork tile.
- Step 2: Place the cork face down on the back of the fabric.
- Step 3: Pull the fabric tight and glue or staple it to the back of the cork.
- Step 4: Trim any extra fabric so the back lies flat.
- Step 5: Add push pins and hang or prop the board where you want it.
5. Handmade Paper Garland

A handmade paper garland is a playful way to decorate a cottagecore office. You can cut shapes like leaves, mushrooms, hearts, or simple circles from kraft paper, old book pages, or colored cardstock.
When you string them together, they create a gentle, whimsical line of shapes that looks nice over a desk, shelf, or window. This craft is easy to customize and doesn’t require special tools.
It’s a relaxing project that lets you play with shapes and textures while adding a bit of charm to your workspace.
Instructions:
- Step 1: Choose your paper and lightly sketch the shapes you want to cut.
- Step 2: Cut out the shapes with scissors, keeping them roughly the same size.
- Step 3: Punch small holes at the top of each shape or tape string to the back.
- Step 4: Thread twine or string through the shapes, spacing them out evenly.
- Step 5: Tie loops at the ends and hang the garland where you like.
6. Decoupaged Wooden Desk Tray

A decoupaged wooden desk tray is a nice way to keep papers, notebooks, or mail in one place while adding a bit of cottagecore style.
By using floral napkins, tissue paper, or printed images, you can give a plain tray a soft, vintage-inspired look. This craft is simple and forgiving, so small wrinkles or overlaps just add to the handmade feel.
The finished tray looks good on a desk or shelf and helps keep clutter under control. It’s a useful piece that also feels creative and personal.
Instructions:
- Step 1: Lightly sand and wipe down a wooden tray if needed.
- Step 2: Cut or tear your paper or napkins into pieces that fit the tray.
- Step 3: Brush a thin layer of Mod Podge onto a small area of the tray.
- Step 4: Press the paper onto the glue, smoothing gently, then seal with more Mod Podge.
- Step 5: Repeat until the tray is covered, then let it dry completely before using.
7. Pressed-Leaf Bookmarks
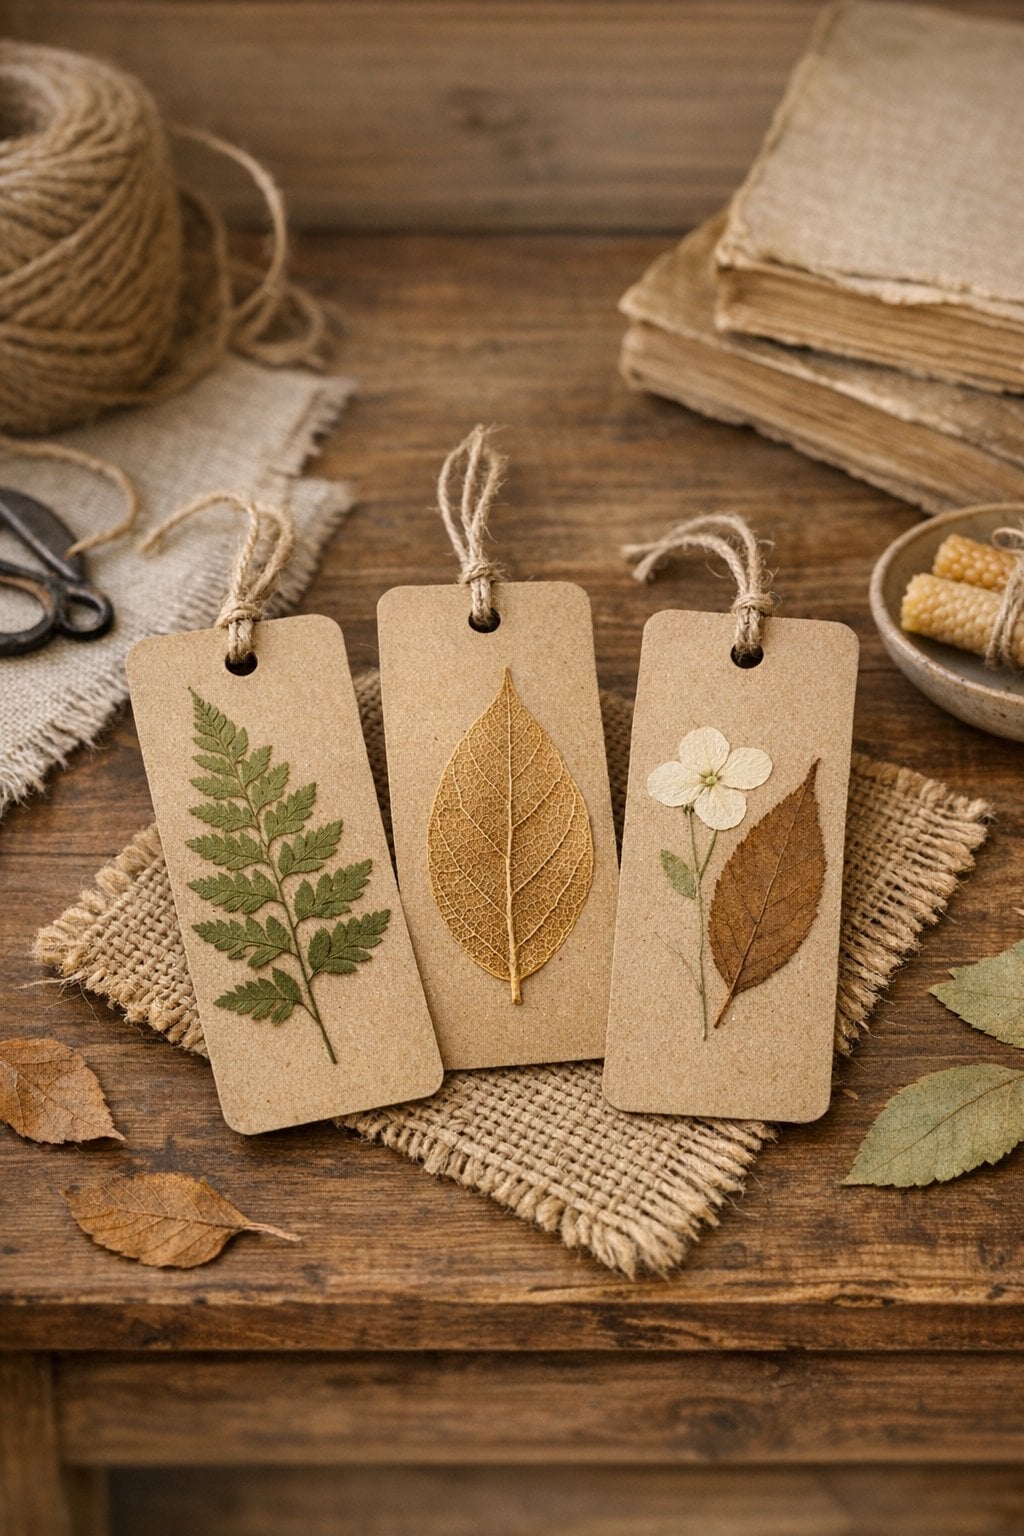
Pressed-leaf bookmarks are simple, pretty, and useful for anyone who keeps notebooks or planners on their desk. They bring a little bit of nature into your office and are easy to make with leaves you’ve collected and dried.
You can keep the design very simple or add small details like handwritten words or washi tape. These bookmarks work well tucked into journals, books, or even as small gifts.
They fit the cottagecore mood with their natural textures and gentle colors.
Instructions:
- Step 1: Choose flat, dried leaves that are fully pressed and not brittle.
- Step 2: Cut cardstock into bookmark-sized rectangles.
- Step 3: Arrange the leaves on the cardstock until you like the layout.
- Step 4: Glue the leaves down and let them dry.
- Step 5: Cover with clear contact paper or laminate to protect, then trim the edges.
8. Crocheted or Knitted Mug Cozy
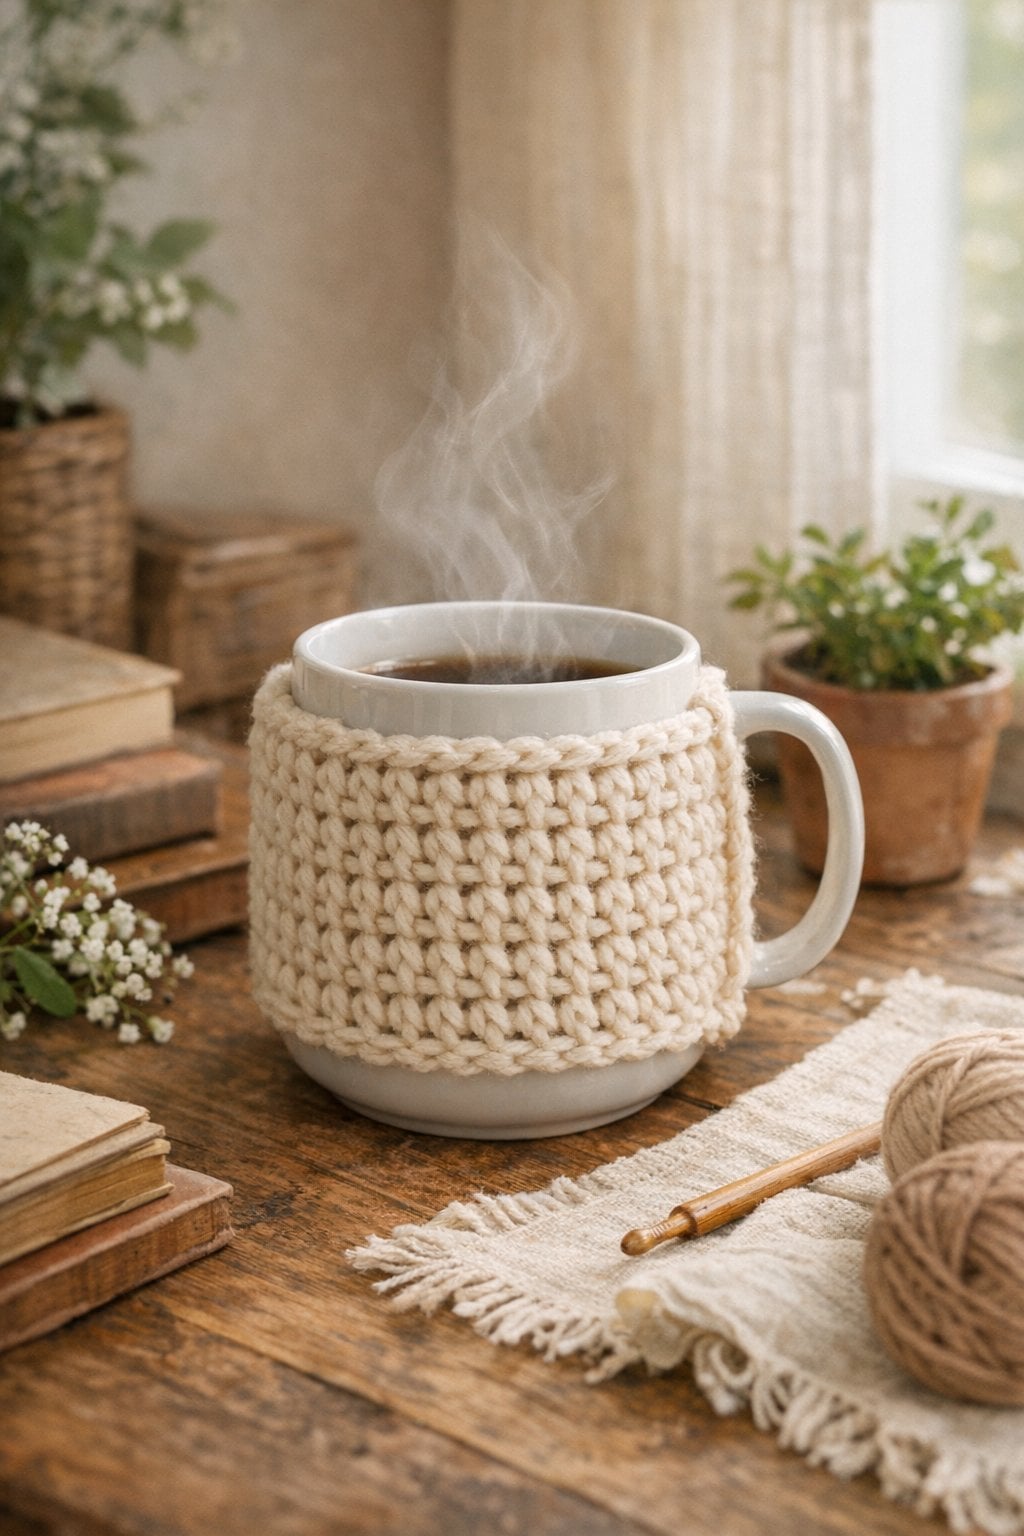
A crocheted or knitted mug cozy adds warmth and texture to your desk while keeping your hands more comfortable when you hold a hot drink. It’s a small project, so it’s a nice way to practice basic stitches or use leftover yarn.
You can keep it plain or add a simple detail like a button or a stripe. The cozy slips around your mug and gives it a soft, handmade look that fits the cottagecore style. It’s a reminder to slow down and enjoy your tea or coffee while you work.
Instructions:
- Step 1: Choose a soft yarn and a hook or needles that match its size.
- Step 2: Measure around your mug and note the height you want the cozy to be.
- Step 3: Crochet or knit a rectangle to match those measurements.
- Step 4: Add a button loop and button, or sew the ends together to form a band.
- Step 5: Slip the cozy onto your mug and adjust it so it fits well.
9. Painted Mini Terracotta Pots

Painted mini terracotta pots are a cheerful way to add plants or small storage to your cottagecore-style office. You can use them for tiny succulents, dried flowers, or even as holders for paper clips and other small items.
Painting the pots in soft colors or simple patterns makes them feel more personal and gentle. This craft is easy to adapt to your style, whether you like florals, dots, or simple color blocking.
A few small pots grouped together can brighten a desk or windowsill…
Instructions:
- Step 1: Wipe the pots to remove dust and let them dry.
- Step 2: Paint the outside with acrylic paint in your chosen colors.
- Step 3: Add simple designs like flowers, stripes, or dots if you like.
- Step 4: Let the paint dry completely, then seal with a clear varnish if desired.
- Step 5: Fill the pots with plants or use them to store small office items.
10. Vintage-Style Label Tags for Storage

Vintage label tags help you keep your office storage organized while adding a gentle, old-fashioned touch. You can use tea-stained paper, kraft paper, or cardstock to make tags for baskets, boxes, and jars.
Handwritten labels or stamped letters give them a simple, personal feel. This craft is easy to adjust as your storage changes, since you can always make new tags.
They fit nicely into a cottagecore office, where things are useful and a little bit nostalgic.
Instructions:
- Step 1: Cut small rectangles or tag shapes from sturdy paper or cardstock.
- Step 2: If you want an aged look, lightly brush the paper with cooled tea and let it dry.
- Step 3: Punch a hole at the top of each tag.
- Step 4: Write or stamp the label names on the tags.
- Step 5: Thread twine or ribbon through the holes and tie the tags onto your storage containers.