In this tutorial we’ll see how to stop the Autoplay function on a Bootstrap carousel.
If you’ve used this component of the Bootstrap framework before, you probably know that by default it cycles through elements automatically as soon as the page is loaded.
This is a nice feature to have, but in certain situations you might not want it. Instead, you might need a static carousel that stops “on page load” or one that stops and starts based on various events that happen on the page, like for example when the user scrolls down the page, clicks on a button or link, etc.
Here we’ll see 3 examples beginning with a simple carousel with no autoplay and then using buttons for pausing and starting the auto slide again.
For this tutorial we’ll use one of these carousel templates (template 3) as an example. At the end you can download all the example templates. Let’s begin!
1. Simple Stop: Remove the Autoplay at Load Time
To remove the autoplay entirely and have a simple carousel that doesn’t cycle, you can do it in two ways.
First, let’s see the HTML code of our carousel (file “index.html”):
<div id="carousel-example" class="carousel slide" data-ride="carousel">
    <ol class="carousel-indicators">
        <li data-target="#carousel-example" data-slide-to="0" class="active"></li>
        <li data-target="#carousel-example" data-slide-to="1"></li>
        <li data-target="#carousel-example" data-slide-to="2"></li>
    </ol>
    <div class="carousel-inner">
        <div class="carousel-item active">
            <img src="assets/img/backgrounds/1.jpg" class="d-block w-100" alt="img1">
            <div class="carousel-caption">
                <h1 class="wow fadeInLeftBig">Carousel Template with Bootstrap 4</h1>
                <div class="description wow fadeInUp">
                    <p>
                        This is a free Carousel template made with the Bootstrap 4 framework.
                        Check it out now. Download it, customize and use it as you like!
                    </p>
                </div>
            </div>
        </div>
        <div class="carousel-item">
            <img src="assets/img/backgrounds/2.jpg" class="d-block w-100" alt="img2">
            <div class="carousel-caption">
                <h1 class="wow fadeInLeftBig">This is Slide 2 of our Carousel</h1>
                <div class="description wow fadeInUp">
                    <p>
                        You can download this free template on <a href="https://azmind.com" target="_blank">AZMIND</a>.
                    </p>
                </div>
            </div>
        </div>
        <div class="carousel-item">
            <img src="assets/img/backgrounds/3.jpg" class="d-block w-100" alt="img3">
            <div class="carousel-caption">
                <h1 class="wow fadeInLeftBig">This is Slide 3, the Last One</h1>
                <div class="description wow fadeInUp">
                    <p>
                        After you download it, you can customize and use it as you like. That's great!
                    </p>
                </div>
            </div>
        </div>
    </div>
    <a class="carousel-control-prev" href="#carousel-example" role="button" data-slide="prev">
        <span class="carousel-control-prev-icon" aria-hidden="true"></span>
        <span class="sr-only">Previous</span>
    </a>
    <a class="carousel-control-next" href="#carousel-example" role="button" data-slide="next">
        <span class="carousel-control-next-icon" aria-hidden="true"></span>
        <span class="sr-only">Next</span>
    </a>
</div>
The HTML code is very simple. Now, the first way to stop the autoplay is by just removing the attribute data-ride=”carousel” from the code above.
The second way, or the JavaScript way, is the one I’ve used in this case. I’ve added this code to the file “scripts.js” (in “assets/js”):
jQuery(window).load(function() {

    /*
        Stop carousel
    */
    $('.carousel').carousel('pause');

});
The carousel component comes with some other methods that you can see in the documentation here.
The carousels in these examples use also some CSS for styling. I’m not showing the code here to keep the tutorial short, but you can find it in the files “style.css” and “media-queries.css” (in the folder “assets/css”).
You can see a PREVIEW of this example HERE.
2. Stop on Button Click (and Start Again on Click)
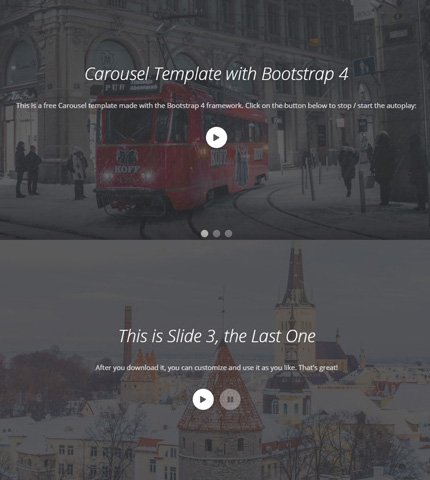
In this example we use a button to make the carousel cycle or pause when the user clicks on it. It looks like this:

Here is the HTML code I’ve added to the carousel for the button (file “index.html”). I’m not showing all the carousel’s code here, just one slide.
<div class="carousel-item active">
    <img src="assets/img/backgrounds/1.jpg" class="d-block w-100" alt="img1">
    <div class="carousel-caption">
        <h1>Carousel Template with Bootstrap 4</h1>
        <div class="description">
            <p>
                This is a free Carousel template made with the Bootstrap 4 framework.
                Click on the button below to stop / start the autoplay:
            </p>
        </div>
        <div class="pause-cycle-button">
            <button type="button" class="btn btn-primary btn-customized">
                <i class="fas fa-pause"></i>
            </button>
        </div>
    </div>
</div>
I’ve added the button’s code to all the slides.
To make it work, I use this JavaScript (jQuery) code (in file “scripts.js”):
/*
    Stop / Start carousel autoplay
*/
$('.btn-customized').on('click', function(){

    if( ! $(this).hasClass('paused') ) {
        $('.carousel').carousel('pause');
        $('.btn-customized').toggleClass('paused');
        $('.btn-customized i').removeClass('fa-pause').addClass('fa-play');
        $(this).blur();
    }
    else {
        $('.carousel').carousel('cycle');
        $('.btn-customized').toggleClass('paused');
        $('.btn-customized i').removeClass('fa-play').addClass('fa-pause');
        $(this).blur();
    }

});
To style the button I use some CSS code, as usual, in the file “style.css”.
You can see a PREVIEW of this example HERE.
3. With Two Buttons: Pause and Play
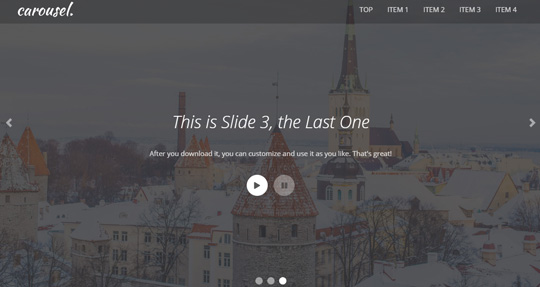
In this case we use two buttons instead of one, Pause and Play, or Stop and Start if you like. It looks like this:

Here is the HTML code (only one slide):
<div class="carousel-item active">
    <img src="assets/img/backgrounds/1.jpg" class="d-block w-100" alt="img1">
    <div class="carousel-caption">
        <h1>Carousel Template with Bootstrap 4</h1>
        <div class="description">
            <p>
                This is a free Carousel template made with the Bootstrap 4 framework.
                Click on the buttons below to stop / start the autoplay:
            </p>
        </div>
        <div class="pause-cycle-buttons">
            <button type="button" class="btn btn-primary btn-customized btn-cycle disabled">
                <i class="fas fa-play"></i>
            </button>
            <button type="button" class="btn btn-primary btn-customized btn-pause">
                <i class="fas fa-pause"></i>
            </button>
        </div>
    </div>
</div>
And here is how we make it work with JavaScript (jQuery):
/*
    Stop / Start carousel autoplay
*/
$('.btn-customized').on('click', function(){

    if( ! $(this).hasClass('disabled') ) {

        if( $(this).hasClass('btn-pause') ) {
            $('.carousel').carousel('pause');
        }
        else {
            $('.carousel').carousel('cycle');
        }

        $('.btn-pause, .btn-cycle').toggleClass('disabled');
        $(this).blur();

    }

});
You can see a PREVIEW of this example HERE.
Download and License
DOWNLOAD: Bootstrap Carousel with No Autoplay (2733 downloads )
LICENSE:
You can use these templates in personal and commercial projects, but you can’t sell or distribute them directly, “as is”. If you plan to use them, a link to this page or any form of spreading the word will be much appreciated.
Conclusion
Disabling the Autoplay feature of a Bootstrap carousel is easy, you can do it with a few lines of HTML/CSS and JavaScript code. I hope that after reading this tutorial, you find it even easier 😉 !
So, download the examples above, play with them, make your own experiments and if you have any question or suggestion, let me know in the comments below.
Stay Updated
Subscribe to the Azmind Newsletter and I’ll update you as soon as I release a new WordPress Theme, Bootstrap Template, Tutorial or other Freebie:
To learn how we use your data when you sign up to our newsletter, read our Privacy Policy here.


This does not work on mobile device, it ignores the “touchstart” and the pause fails. It there a workaround?
This no longer works. I’m looking at the play/pause on click, and after I pause it, and the icon flips to a play button… as soon as I mouse away, the carousel continues, and the icon never flips back. Then, I’m watching a carousel move after it’s been paused.
The best to turn off the carousel feature, allowing the user to navigate each slide, is to data-interval=”false” to the carousel container